Categories
Blog

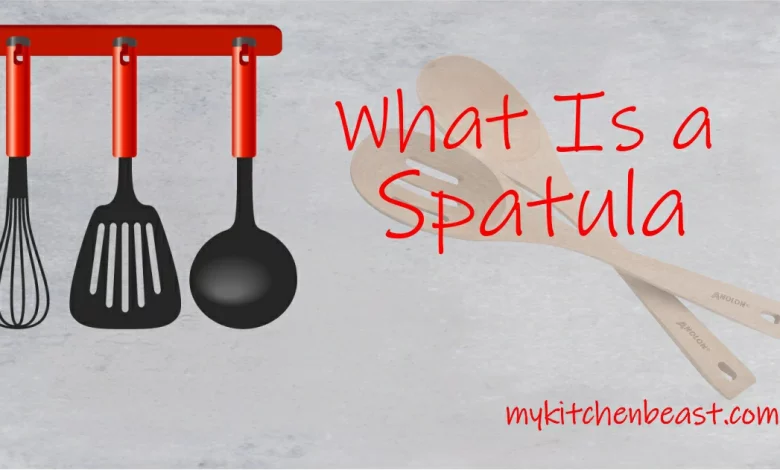
What Is a Spatula

A spatula is a versatile kitchen tool that can be used to flip, scoop, and move food, among other things. They are made of metal, plastic, or wood, and they come in different shapes and sizes. What kind of spatula is used depends on what is being cooked and what the task is. This guide talks about the different kinds of spatulas and how to use them, as well as gives tips on how to use one well. If you know the different kinds of spatulas and how to use them, you can make the most of this important kitchen tool.

What Is A Spatula?

spatula is a kitchen tool

A spatula is a kitchen tool that can be used to do many different things, like flip food, spread spreads, scrape food, and lift food. It is an important tool for any kitchen, whether you are a professional chef or just cook at home.

There are different kinds of spatulas on the market, and each one is made for a certain job. The flat spatula is the most common type of spatula, and it is used to flip and lift food. Other kinds of spatulas include slotted spatulas, which are used to drain liquids and offset spatulas, which are used for spreading and icing.

Why A Good Spatula Is Important And The Importance Of A Good Spatula

A good spatula is a must-have in every kitchen because it makes cooking and baking easier and faster. A good spatula should be easy to hold, durable, and have a good grip. It should also be able to handle the heat so that it doesn’t melt or warp when used on hot surfaces.

Why do spatulas have slots?

Spatulas with slots are designed with specific features that serve various culinary purposes, enhancing the cooking experience in many ways. Here are some critical advantages of spatulas with slots.

Drainage Efficiency

The primary function of slots in spatulas is to enable efficient drainage. These slots allow excess liquids or oils to escape from cooked food quickly. Whether cooking stir-fried vegetables or searing a piece of fish, the slots help reduce excess moisture, preventing the food from becoming overly soggy or greasy.

Precision Handling

Slotted spatulas are handy for delicate tasks that require precision. The slots enable you to pick up and flip food items without disturbing the cooking surface or causing them to break apart. This is especially beneficial when handling delicate items like fish fillets, ensuring they remain intact during cooking.

Versatility

Slotted spatulas are versatile kitchen tools suitable for various cooking techniques. Whether you’re sautéing, flipping, or serving food, the slots make handling different types of dishes easier, making them an indispensable tool in any kitchen.

Healthier Cooking

The slots in spatulas help promote healthier cooking by allowing excess oil or fat to drain away from the food. This is particularly useful when preparing dishes that release a significant amount of grease, such as bacon, helping to reduce the overall fat content of the meal.

Enhanced Presentation

Slotted spatulas are often used for plating food, allowing chefs to create visually appealing presentations. The slots create an attractive visual contrast between the food and the serving plate, adding an element of sophistication to the dish.

What are the holes used for in a spatula?

The holes in a spatula, often called slots, serve several vital purposes in the kitchen. These slots are intentionally designed to enhance the functionality of the spatula and improve various aspects of cooking and food preparation.

Drainage

One of the primary purposes of the slots in a spatula is to facilitate the drainage of excess liquids, oils, or cooking liquids. For instance, when cooking foods that release juices or oils, such as bacon, the slots allow these fluids to drain away, leaving the cooked food with less grease. This helps prevent the food from becoming soggy or overly oily.

Precision Handling

The slots in a spatula enable you to handle and flip food items with greater precision. When scanning delicate items like fish fillets or pancakes, the slots make lifting and turning the food easier without breaking it apart. This precision handling ensures that your food remains intact during the cooking process.

Versatility

Slotted spatulas are versatile kitchen tools that can be used for various cooking techniques. Whether you’re sautéing, flipping, or serving food, the slots make handling different types of dishes easier, making the spatula suitable for various culinary tasks.

Healthier Cooking

Slots in spatulas contribute to healthier cooking by allowing excess oil or fat to drain away from the food. This is especially beneficial when preparing items that release a significant amount of grease, as it reduces the overall fat content of the dish.

Enhanced Presentation

Slotted spatulas are often used for plating food, as the slots create an appealing visual contrast between the food and the serving plate. This can make the presentation of the dish more visually appealing and elegant.

What Is A Spatula Used For?

A spatula is used for a variety of tasks in the kitchen. It can be used to turn food, such as pancakes or eggs, into a frying pan. It can also be used to scoop and move food, such as burgers or vegetables, from one place to another. A spatula can also be used to spread sauces, such as ketchup, mayonnaise, or mustard, onto food.

Types Of Spatulas

There are a variety of different types of spatulas that can be used for different tasks. The most common types of spatulas are:

Silicone Spatula

Silicone SpatulaA silicone spatula is a great all-around tool that can be used to stir food and scrape it out of pots and pans. It is made of silicone, which is flexible and can handle the heat. This makes it great for use with hot foods. With a silicone spatula, it’s easy to move food around in a pan without breaking it because the blade is flexible.

Metal Spatula

A metal spatula is a strong tool made for turning and flipping food. It is made of a strong metal like stainless steel or aluminum, so it can be used with hot foods. A metal spatula’s flat blade makes it easy to move food around in a pan without breaking it.

Wooden Spatula

Wooden SpatulaA wooden spatula is a versatile tool that can be used to stir food and scrape it out of pots and pans. It is made of a soft wood like maple or birch, which makes it perfect for use with delicate foods. A wooden spatula’s flat blade makes it easy to move food around in a pan without breaking it.

Flat Spatulas

The most common kind of spatula is the flat one. They usually have a wide, flat blade and are made of metal, plastic, or wood. The best way to use them is to turn food in a pan or scoop and move food.

Offset Spatulas

Offset SpatulasOffset spatulas are made with a thin, curved blades that can fit into small spaces. They are perfect for spreading sauces, frosting, and other ingredients evenly over a surface.

Flexible Spatulas

Flexible spatulas are made to be more flexible than spatulas that are flat or offset. They are great for getting into tight spaces and flipping delicate foods like pancakes or omelets.

Slotted Spatula

Slotted SpatulaThe slotted spatula is made to let liquids run off. It has holes or slots in the blade that let liquids drain away. This makes it perfect for lifting and turning delicate foods like fish and eggs.

9 Benefits Of Using A Spatula

A spatula is an important tool in the kitchen that can be used for many different cooking and baking jobs. It is a flat, flexible blade made of metal, plastic, or silicone that is used to flip, scrape, spread, and lift food. In this article, we’ll talk about the benefits of using a spatula in the kitchen and how it can make cooking and baking easier and more fun.

1. Versatility

One of the best things about a spatula is that it can be used for many different things. A good spatula can be used for many things, like flipping pancakes, eggs, or burgers, spreading batter evenly in a pan, lifting delicate foods like fish or omelets, and scraping the last bits of batter or sauce out of a bowl. This makes it an essential tool for any kitchen.

2. Non-Stick Cooking

There are different kinds of spatulas made of different materials, like silicone and plastic, which are great for cooking without sticking. Silicone spatulas can handle high temperatures and can be used on nonstick cookware without damaging it. Because of this, they are great for flipping delicate foods like fish or omelets and spreading sauces and other liquids.

3. Easy to clean up

A spatula is also easy to clean, which is another reason to use one. Most spatulas can be cleaned easily in the dishwasher, and silicone spatulas can be cleaned with a damp cloth. This makes them a useful and easy-to-take-care-of kitchen tool.

4. Simple to use

A lot of spatulas have handles that are made to be comfortable and easy to use. Most of the time, these handles are made of a soft, non-slip material that makes them easy to hold and lessens hand fatigue when cooking for a long time. This makes the spatula fun to use and makes it less likely that you’ll hurt yourself while cooking.

5. Durability

A good spatula is a durable tool that, with the right care, can last for many years. Many spatulas are made of strong and long-lasting materials like metal, plastic, or silicone. This makes them a good investment that will serve you well in the kitchen for many years.

6. Food Safety

Using a spatula in the kitchen helps make sure that food is safe to eat. Many spatulas are made of materials that are safe to use with food, like silicone or plastic, and they don’t have any harmful chemicals that could get into the food. This makes them safer than other kitchen tools for cooking and baking.

7. Preventing Cross-Contamination

Using a spatula in the kitchen can help keep food from getting dirty. Cross-contamination happens when bacteria from raw food get on other foods. This can make you sick with food poisoning. By using a spatula, you can keep raw food away from cooked food, which makes it less likely that the two will get mixed up.

8. Aesthetically Pleasing

Many spatulas are also nice to look at, in addition to being useful. They come in a wide range of colors and styles and can look good in any kitchen. Some spatulas have handles that are pretty and can be used to add a splash of color to your kitchen.

9. Affordability

Another good thing about using a spatula is that they are cheap. A high-quality spatula can be bought for a reasonable price, which makes it a good value for any kitchen. This means that everyone can use them.

What is the difference between a tongs and a spatula?

A pair of tongs and a spatula are two different tools that are used in the kitchen for different things.

Tongs are used to pick up and move things like meat, vegetables, and fruit. They look like scissors and have two arms that can open and close on a hinge. Most of the time, tongs are used to pick up hot food without getting burned.

On the other hand, a spatula is a flat, flexible tool that is used to flip, spread, or scrape food. In cooking and baking, spatulas are often used. They come in a variety of shapes and sizes, like offset spatulas for frosting cakes and turner spatulas for flipping pancakes or burgers.

In conclusion, tongs are used to hold food, while spatulas are used to move food around.

Our Final Thoughts

A spatula is a useful tool in the kitchen that can be used to turn, scoop, and move food. It comes in different shapes, sizes, and materials, such as metal, plastic, or wood. What kind of spatula is used depends on what is being cooked and what the task is. It makes cooking easier and faster and keeps the taste and texture of food the same.

FAQs

What is the best type of spatula to use?

The best type of spatula to use depends on the task at hand. Silicone spatulas are great for stirring, metal spatulas are great for flipping, and wooden spatulas are great for stirring delicate foods.

What is the difference between a spatula and a spoon?

The main difference between a spatula and a spoon is the shape of the blade. A spoon has a round bowl-shaped blade, while a spatula has a flat blade. Spoons are typically used for stirring, while spatulas are typically used for flipping and scraping.

Can I use a spatula to mix ingredients?

Yes, you can use a spatula to mix ingredients. However, it is best to use a wooden spoon or a whisk for this task, as a spatula is not designed for mixing.

What is the best type of spatula for spreading sauces?

The best type of spatula for spreading sauces is an offset spatula. The narrow, curved blade allows you to easily and evenly spread sauces onto food.

What is the best type of spatula for flipping pancakes?

The best type of spatula for flipping pancakes is a flexible spatula. The flexible blade allows you to easily and safely flip delicate pancakes without tearing them.

Categories
Blog

Boning Knife vs Fillet Knife: Which One Should You Choose?

Boning knives and fillet knives are two essential tools for any cook who wants to prepare meat and fish properly. While they may look similar, there are some key differences between the two types of knives that make them each ideal for different tasks.

Today, we will discuss the differences between boning knives and fillet knives, as well as how to choose the right knife for the job. We will also provide some tips on how to use each type of knife safely and effectively.

Differences Between Boning and Fillet Knives

Boning knives and fillet knives are two types of kitchen knives that are used for different purposes. Boning knives are typically used to remove bones from meat, while fillet knives are used to fillet fish. Both types of knives have a long, thin blade that is curved slightly at the tip. However, there are some key differences between the two knives that you should be aware of before you buy one.

Blade Length

Boning knives typically have a blade length of between 6 and 8 inches, while fillet knives typically have a blade length of between 8 and 10 inches. The longer blade of a fillet knife allows you to make more precise cuts, which is important when filleting fish.

Blade Width

Boning knives typically have a blade width of between 1 and 1.5 inches, while fillet knives typically have a blade width of between 0.5 and 1 inch. The narrower blade of a fillet knife allows you to make more delicate cuts, which is important when filleting fish.

Blade Shape

Boning knives typically have a straight blade, while fillet knives typically have a curved blade. The curved blade of a fillet knife allows you to make more precise cuts, which is important when filleting fish.

Handle Material

Boning knives and fillet knives can both be made with a variety of handle materials, including wood, plastic, and metal. The handle material of a knife is a matter of personal preference. However, you should choose a handle material that is comfortable for you to grip and that will not slip in your hand when wet.

Overall Weight

Boning knives and fillet knives can both vary in weight, but they are typically on the lighter side. This is because they are designed to be used for delicate tasks.

Price

Boning knives and fillet knives can range in price from a few dollars to several hundred dollars. The price of a knife will depend on the materials used to make it, the brand name, and the quality of the construction.

Boning Knife

Boning Knife

A boning knife is a long, thin knife with a sharp point that is used to remove bones from meat. It has a flexible blade that allows it to follow the contours of the bone, making it easier to remove the meat without damaging it. Boning knives are typically made from stainless steel or carbon steel, and they have a serrated edge that helps to prevent the meat from sticking to the blade.

Fillet Knife

Fillet Knife

A fillet knife is a long, thin knife with a flexible blade that is used to fillet fish. The blade is typically made of stainless steel or carbon steel, and it has a sharp, serrated edge. Fillet knives are available in a variety of sizes, but the most common size is between 6 and 8 inches.

Fillet knives are used to remove the skin and bones from fish, and they are also used to make thin slices of fish. They are essential for preparing fish for cooking, and they are also a great tool for making sushi and sashimi.

When choosing a fillet knife, it is important to consider the size of the fish that you will be filleting. A larger knife will be more difficult to maneuver around a small fish, and a smaller knife will not be able to handle a large fish. It is also important to consider the weight of the knife. A heavy knife will be more difficult to use for extended periods of time, and a light knife will be easier to control.

Fillet knives are a valuable tool for any cook who enjoys preparing fish. They are easy to use and they make the process of filleting fish much more efficient.

Choosing the Right Knife for the Job

a fishmonger using a fillet knife to fillet a fish
A Fishmonger using a Fillet Knife to Fillet a Fish

When choosing a boning knife or fillet knife, there are a few factors to consider.

First, consider the size of the knife. Boning knives are typically longer than fillet knives, and they have a wider blade. This makes them better suited for deboning large pieces of meat. Fillet knives, on the other hand, are shorter and have a thinner blade. This makes them better suited for filleting smaller pieces of fish.

Second, consider the material of the knife. Boning knives are typically made from stainless steel, while fillet knives are often made from carbon steel. Stainless steel is more resistant to corrosion, but it is also more difficult to sharpen. Carbon steel is easier to sharpen, but it is more prone to rust.

Finally, consider the price of the knife. Boning knives and fillet knives can range in price from a few dollars to several hundred dollars. The price of the knife will depend on the quality of the materials and the craftsmanship.

Once you have considered these factors, you can choose the right knife for the job.

How to Use a Boning Knife

a boning knife and a fillet knife on a cutting board

To use a boning knife, hold it in your dominant hand with the blade facing down. Place the tip of the blade at the joint between the meat and the bone and gently saw back and forth until the meat is released. Be careful not to cut yourself on the sharp blade.

Once the meat is free from the bone, you can use the boning knife to trim any excess fat or sinew. You can also use it to make small incisions in the meat to help it cook more evenly.

Boning knives are very sharp, so it is important to be careful when using them. Always keep the blade pointed away from your body and never use it to cut towards yourself.

FAQs

Which knife is better for deboning meat?

A boning knife is better for deboning meat because it has a sharp point that can easily penetrate the meat and remove the bones.

Which knife is better for filleting fish?

A fillet knife is better for filleting fish because it has a serrated edge that can easily cut through the skin and bones of the fish.

How do I care for my knives?

To care for your knives, you should:

  • Wash them by hand with warm, soapy water
  • Dry them thoroughly after washing
  • Store them in a dry, safe place

What are some other types of knives that I might need?

Some other types of knives that you might need include:

  • Chef’s knife
  • Paring knife
  • Serrated knife
  • Utility knife

Where can I buy knives?

You can buy knives at a variety of stores, including:

Caring for Your Knives

Categories
Blog

How to Sharpen a Knife Without a Sharpener Like A Pro

Sharpening a knife is an essential skill for any cook, but it can be difficult to do without the right tools. If you don’t have a knife sharpener, don’t worry; there are a few simple ways to sharpen your knives at home.

How to Sharpen a Knife Without a Sharpener

If you don’t have a knife sharpener, there are a few ways you can sharpen your knives at home. Here are three methods:

Use a honing steel

metal rod that is used to realign the edge of a knife

A honing steel is a long, metal rod that is used to realign the edge of a knife. To use a honing steel, hold the knife at a 20-degree angle and draw it down the steel several times.

Use a ceramic rod

A ceramic rod is a rod made of ceramic that is used to sharpen knives. To use a ceramic rod, hold the knife at a 20-degree angle and draw it down the rod several times.

Use a sharpening stone

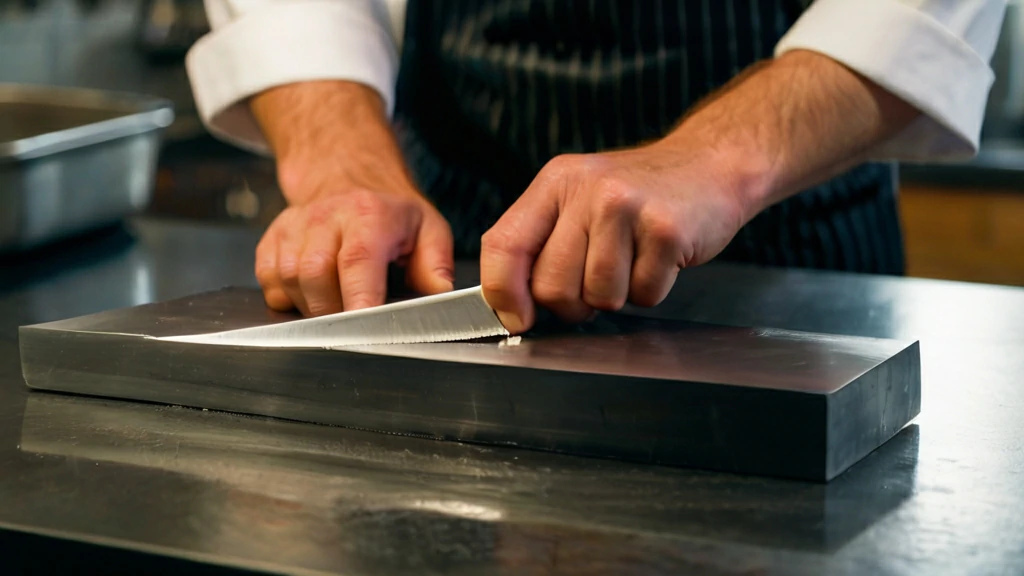
a chef sharping a knife on Whetstone in kitchen

A sharpening stone is a block of abrasive material that is used to grind away the metal on a knife’s edge. To use a sharpening stone, hold the knife at a 20-degree angle and draw it across the stone several times.

No matter which method you use, be sure to sharpen your knives regularly to keep them in good condition. Sharp knives are safer to use and make cutting tasks easier.

How to Sharpen a Knife

Sharpening a knife is a simple task that can be done with a few household items. By following these steps, you can keep your knives sharp and in good condition.

  • Place the knife on a cutting board.
  • Hold the sharpening stone at a 20-degree angle.
  • Draw the knife across the stone in a smooth motion.
  • Repeat steps 2–3 on the other side of the knife.
  • Wipe the knife clean with a damp cloth.

Safety Tips for Sharpening Knives

When sharpening knives, it is important to take precautions to avoid injury. Here are a few safety tips:

  • Use a sharp knife. A dull knife is more likely to slip and cause injury.
  • Wear gloves to protect your hands.
  • Keep the knife sharp. A sharp knife will require less force to use, reducing the risk of injury.
  • Be careful not to cut yourself.
  • Store knives in a safe place.

Common Mistakes When Sharpening Knives

When sharpening your knives, it is important to avoid making common mistakes that can damage your knives and make them more difficult to sharpen in the future. Here are some common mistakes to avoid:

  • Using the wrong type of sharpener for your knife.
  • Applying too much pressure to the knife.
  • Sharpening the knife at too steep an angle.
  • Not sharpening the knife often enough.

By avoiding these mistakes, you can help keep your knives sharp and in good condition. If you are unsure how to sharpen your knives properly, it is best to consult with a professional.

What is a knife sharpener?

A knife sharpener is a tool used to sharpen the blade of a knife. It can be either manual or electric, and it uses an abrasive surface to grind away the metal at the edge of the blade, creating a new, sharp edge.

There are many different types of knife sharpeners on the market, each with its advantages and disadvantages. Some of the most popular types include:

  1. Whetstones
  2. Sharpening rods
  3. Electric knife sharpeners

The best type of knife sharpener for you will depend on your individual needs and preferences. If you are not sure which type of knife sharpener is right for you, consult with a professional.

How Often Should You Sharpen Your Knives?

The frequency with which you need to sharpen your knives depends on factors such as the type of knives you use, how often you use them, the type of food you prepare, and your sharpening skills. In general, you should sharpen your knives at least once a month if you use them regularly. If you use your knives for heavy-duty tasks, you may need to sharpen them more often.

  • You can also tell if your knives need to be sharpened by performing a simple test:
  • Hold the knife at a 45-degree angle to a piece of paper.
  • Draw the knife across the paper.
  • If the paper tears easily, your knives are sharp. If not, they need sharpening.

Our Final Thoughts

We have discussed how to sharpen a knife without a sharpener, providing step-by-step instructions on using a whetstone, a honing rod, and a ceramic rod. We’ve emphasized the benefits of regular sharpening and the importance of using the right tools. We hope this information has been helpful, and if you have further questions, please don’t hesitate to contact us.

Categories
Blog

How to Use Clip-On Pressure Cooker for Effortless and Flavorful Meals

In the realm of modern culinary exploration, the clip-on pressure cooker stands as a versatile marvel, streamlining the cooking process and revolutionizing the way we approach time-sensitive recipes. As we delve into the art of utilizing this innovative kitchen appliance, this guide aims to demystify the intricacies of how to use clip-on pressure cookers.

With convenience at the forefront, clip-on pressure cookers have become a staple for home chefs seeking efficiency without compromising flavor. Whether you’re a seasoned cook or a kitchen novice, mastering the art of these pressure cookers opens a gateway to a world of culinary possibilities.

In this comprehensive guide, we will navigate through the essential components, safety measures, and step-by-step instructions for harnessing the full potential of your clip-on pressure cooker. From assembling the cooker with precision to crafting delectable meals, we’ll unravel the secrets to a seamless cooking experience.

Join us on this culinary journey as we explore the ins and outs of clip-on pressure cookers, empowering you to confidently wield this culinary tool and elevate your cooking prowess. Let’s embark on a flavorful adventure that combines the precision of technology with the warmth of homemade meals.

Overview of Clip-On Pressure Cookers

how to use clip on pressure cooker

In the fast-paced realm of modern kitchens, clip-on pressure cookers have emerged as indispensable allies for culinary enthusiasts. These innovative appliances combine efficiency and convenience, transforming the cooking experience for both seasoned chefs and kitchen novices alike.

Features and Benefits

Compact Design

One of the defining features of clip-on pressure cookers is their compact and user-friendly design. Unlike traditional pressure cookers, the clip-on variety often boasts a streamlined structure that enhances storage convenience.

Ease of Assembly

Highlighting their user-centric design, clip-on pressure cookers typically come with straightforward assembly processes. This feature not only simplifies usage but also caters to individuals who may be new to the world of pressure cooking.

Versatile Cooking Options

From rapid cooking to slow simmering, clip-on pressure cookers offer a versatile range of cooking options. Users can confidently experiment with various recipes, unlocking the potential for diverse culinary creations.

Time and Energy Efficiency

The efficiency of clip-on pressure cookers in reducing cooking times and conserving energy is a standout benefit. With their sealed construction and innovative pressure mechanisms, these cookers accelerate cooking processes without compromising on flavor.

Unique Characteristics

Secure Clip-On Lid

Unlike traditional pressure cookers with intricate locking mechanisms, clip-on pressure cookers often feature a secure and easy-to-use clip-on lid. This design not only enhances safety but also ensures a hassle-free cooking experience.

Adaptable Pressure Settings

Another distinguishing characteristic is the presence of adaptable pressure settings. Users can tailor the cooking environment to suit specific recipes, providing a level of control that contributes to culinary precision.

Enhanced Safety Measures

Many clip-on pressure cookers incorporate advanced safety features, such as pressure indicators and secure locking mechanisms, ensuring a risk-free cooking environment.

As we navigate through this guide, we will delve deeper into these features and benefits, equipping you with the knowledge to maximize the potential of your clip-on pressure cooker and elevate your culinary endeavors.

Safety Precautions for Clip-On Pressure Cooker

The exhilarating journey into the world of clip-on pressure cooking comes with the responsibility of ensuring a secure and risk-free culinary experience. Prioritizing safety is paramount to unleash the full potential of your clip-on pressure cooker without compromising on well-being. Let’s delve into detailed safety precautions and guidelines to navigate this culinary adventure with confidence.

Familiarize Yourself with the User Manual of Clip-On Pressure Cooker

Begin by thoroughly reading and understanding the manufacturer’s user manual that accompanies your clip-on pressure cooker. This foundational step provides crucial insights into specific safety features and operational guidelines.

Inspect Seals and Valves Regularly

check the seals and valves of your pressure cooker

Periodically check the seals and valves of your pressure cooker for any signs of wear or damage. A well-maintained sealing system is essential for the cooker to function optimally and safely.

Properly Secure the Clip-On Lid

Before initiating any cooking process, ensure that the clip-on lid is securely fastened. A properly sealed lid is instrumental in maintaining pressure levels and preventing any potential accidents during cooking.

Mindful Pressure Release

Exercise caution when releasing pressure after cooking. Follow the manufacturer’s recommendations for safe pressure release methods, whether it involves natural release or manual release. This step mitigates the risk of steam-related injuries.

Avoid Overfilling

Adhere to recommended filling limits to prevent overpressure situations. Overfilling the cooker can compromise its safety features and lead to unpredictable outcomes.

Use Adequate Liquid

Guarantee the presence of sufficient liquid when cooking with a clip-on pressure cooker. Inadequate liquid levels can result in excessive pressure buildup and compromise the cooker’s safety.

Mindful Placement on Stovetops

If your clip-on pressure cooker is suitable for stovetop use, ensure it is appropriately sized for the burner. Incorrect placement can lead to uneven heating and safety hazards.

Educate Household Members

If multiple individuals use the pressure cooker, ensure that everyone is well-informed about its proper usage and safety precautions. A collective understanding reduces the likelihood of accidents.

Handle with Care

Exercise caution when handling hot components. Use heat-resistant mitts or utensils to prevent burns, and avoid direct contact with hot surfaces.

Immediate Inspection of Damaged Parts

If any part of the clip-on pressure cooker appears damaged or compromised, refrain from using it until the issue is rectified. Prompt maintenance ensures the longevity and safety of the appliance.

By integrating these safety measures into your clip-on pressure cooking routine, you’ll embark on a culinary adventure that is not only delicious but also secure. Stay vigilant, follow these guidelines diligently, and savor the joy of cooking with confidence.

Assembling Your Clip-On Pressure Cooker with Precision

Components of a Clip-On Pressure Cooker

Before embarking on your culinary journey, it’s crucial to familiarize yourself with the components that make up your clip-on pressure cooker. Understanding each part ensures a seamless assembly process. Here are the key components:

Base Unit

The foundational part that houses the heating element and provides stability.

Clip-On Lid

A secure lid with a convenient clip mechanism designed to fasten tightly to the cooker.

Sealing Ring

A rubber or silicone ring that forms a pressure-tight seal between the lid and the pot.

Pressure Indicator

A visual indicator that shows when the pressure inside the cooker has reached the desired level.

Pressure Valve

A valve that regulates the internal pressure and releases excess steam to maintain safety.

Handle(s)

Sturdy handles for safe and convenient transportation of the pressure cooker.

Inner Pot

The removable cooking container where ingredients are placed for cooking.

Assembly Instructions

Now, let’s break down the step-by-step process to assemble your clip-on pressure cooker correctly:

Inspect Components

Before assembly, check all components for cleanliness and ensure there are no damages or missing parts.

Place the Sealing Ring

Ensure the sealing ring is properly placed in the designated groove around the inside edge of the lid. Make sure it sits securely and is free from any folds or twists.

Attach the Clip-On Lid

Align the lid with the cooker’s opening and gently press down. Engage the clip mechanism by securing it firmly around the rim of the cooker.

Position the Inner Pot

Place the inner pot into the cooker, ensuring it sits evenly and securely on the base.

Adjust Handles

If your pressure cooker has multiple handles, adjust them to a position that provides a comfortable grip for lifting and handling.

Check Pressure Valve

Ensure that the pressure valve is clean and moves freely. It should be properly seated in its designated position on the lid.

Inspect Pressure Indicator

Check that the pressure indicator is functioning correctly and is visible through the designated window on the lid.

Securely Close the Lid

Close the lid securely by pressing down evenly on both sides. Confirm that the clip mechanism engages with a satisfying click.

Perform a Trial Seal Check

Before cooking, perform a trial seal check by pressing down on the center of the lid. It should resist being pushed down, indicating a proper seal.

Verify Handles are Secure

Double-check that all handles are securely fastened, ensuring a stable and safe grip during use.

By following these step-by-step instructions, you’ll assemble your clip-on pressure cooker with precision, setting the foundation for a successful and secure cooking experience. Now, you’re ready to explore the culinary possibilities of your well-assembled pressure cooker.

Operating Instructions

Lid of Clip-On Pressure Cooker

Securing the Lid

  • Place the prepared ingredients in the inner pot.
  • Align the clip-on lid with the cooker’s opening.
  • Press down evenly on both sides until you hear a satisfying click, indicating that the lid is securely fastened.

Adjusting Pressure Settings

  • Before turning on the heat, ensure the pressure valve is in the sealed position.
  • Depending on your recipe and the desired pressure level, set the pressure regulator or adjust the settings on your cooker. Refer to your user manual for specific instructions.

Setting the Cooking Time

  • Set the cooking time according to your recipe using the controls on your pressure cooker.
  • If your pressure cooker has multiple pressure levels, select the appropriate setting for your dish.

Turning on the Heat

  • Place the pressure cooker on the heat source, whether it’s a stovetop or an electric base.
  • Ensure the heat setting is appropriate for your recipe, and the cooker starts building pressure.

Monitoring the Pressure Indicator

  • Keep an eye on the pressure indicator. Once it reaches the desired pressure level, the cooking process begins.
  • Some cookers have visual indicators or audible signals to alert you when the target pressure is reached.

Maintaining a Steady Pressure

Adjust the heat as needed to maintain a steady pressure throughout the cooking time. Follow the recipe guidelines for any adjustments required during the process.

Completing the Cooking Cycle

  • Once the cooking time is complete, turn off the heat source.
  • Follow the recommended pressure release method for your recipe. Some dishes benefit from natural release, while others may require a quick release to prevent overcooking.

Troubleshooting Tips

Pressure Loss During Cooking

Check the lid seal for any visible issues and ensure it’s correctly positioned. A compromised seal can lead to pressure loss.

Difficulty Securing the Lid

Ensure the lid is aligned correctly and that the clip mechanism is engaged. If you’re having trouble, inspect the lid and cooker edges for any obstructions.

Excessive Steam Release

Verify that the pressure valve is correctly positioned and not clogged. Clean the valve if necessary.

Double-check that the sealing ring is properly seated to prevent steam leaks.

Uneven Cooking

Confirm that ingredients are uniformly cut for even cooking.

Stir ingredients before sealing the lid to distribute heat evenly.

Burnt Residue on the Bottom

Adjust the heat settings to prevent scorching, especially when cooking recipes with thicker sauces.

Deglaze the bottom if necessary to prevent a burn notice.

Cooker Not Reaching Pressure

Check the sealing ring, pressure valve, and lid for any issues that might prevent the cooker from reaching pressure.

Ensure the cooker is not overfilled, and there’s enough liquid for steam generation.

By following these operating instructions and troubleshooting tips, you’ll confidently navigate the clip-on pressure cooking process, creating delicious and perfectly cooked meals with ease.

Cleaning After Use to Clip-On Pressure Cooker

Allow Cooling Time

Before cleaning, allow the clip-on pressure cooker to cool down. This ensures safe handling and prevents burns.

Disassemble Components

Remove the inner pot, sealing ring, pressure valve, and any other detachable parts to thoroughly clean Clip-On Pressure Cooker.

Hand Wash Components

Wash the removable components, including the inner pot and sealing ring, with warm, soapy water. Use a non-abrasive sponge or cloth to avoid damaging surfaces.

Clean the Lid

Wipe down the clip-on lid with a damp cloth. Pay special attention to the sealing ring area to remove any food particles.

Inspect and Clean the Pressure Valve

Inspect the pressure valve for any residue or blockages. Clean it using a soft brush or by soaking it in warm, soapy water. Ensure it moves freely after cleaning.

Clean the Base Unit

Wipe the exterior of the base unit with a damp cloth. Avoid immersing the entire cooker in water, especially if it has an electric base.

Check for Residue:

Inspect the bottom of the cooker for any burnt or stuck-on residue. If needed, use a non-abrasive scouring pad or a mixture of baking soda and water to gently scrub away residue.

Dry Thoroughly:

Ensure all components are completely dry before reassembling the clip-on pressure cooker. Moisture can lead to unpleasant odors or even damage the cooker over time.

Maintaining Longevity

Regularly Inspect Seals and Valves

Periodically check the sealing ring and pressure valve for wear and tear. Replace them if you notice any damage to maintain a proper seal.

Avoid Abrasive Cleaners

Refrain from using abrasive cleaners or scouring pads on the cooker’s surfaces, as they can cause scratches and damage the finish.

Store with Care

Store the clip-on pressure cooker with the lid upside down to allow proper ventilation and prevent any lingering odors.

Keep the Lid Seal Clean

Regularly clean the lid seal to prevent food particles from accumulating. This ensures a tight seal during cooking.

Inspect Handles and Latches

Check handles and clip mechanisms for any signs of wear or loosening. Tighten screws if necessary to maintain the cooker’s structural integrity.

Follow the Manufacturer’s Recommendations

Adhere to the manufacturer’s guidelines for maintenance and care. This includes any specific recommendations for your clip-on pressure cooker model.

Store in a Cool, Dry Place

When not in use, store the clip-on pressure cooker in a cool, dry place away from direct sunlight. This prevents potential damage and prolongs its lifespan.

By following these cleaning and maintenance guidelines, you’ll not only keep your clip-on pressure cooker in top condition but also ensure its longevity, allowing you to enjoy many delicious meals for years to come.

FAQs

How does a clip-on pressure cooker work, and what makes it different from other types of pressure cookers?

A clip-on pressure cooker operates similarly to traditional pressure cookers but features a convenient clip-on lid mechanism. This design ensures a secure seal, simplifying the assembly process and making it user-friendly. The clip-on feature distinguishes it from other pressure cookers, offering efficiency and ease of use.

 Can I use my clip-on pressure cooker on a regular stovetop?

Yes, many clip-on pressure cookers are designed for use on regular stovetops. However, it’s essential to check the manufacturer’s instructions for your specific model. Some may also be compatible with induction cooktops.

Are clip-on pressure cookers safe to use?

A: Absolutely. Clip-on pressure cookers are designed with safety features, including secure lid mechanisms, pressure indicators, and reliable pressure release valves. Following proper usage guidelines and safety precautions outlined in the user manual ensures a safe cooking experience.

How do I know when it’s safe to open the clip-on pressure cooker after cooking?

Once the cooking time is complete, wait for the pressure to release naturally for a few minutes if specified in your recipe. For a quicker release, follow the manufacturer’s instructions for manual pressure release. Ensure the pressure indicator has dropped before opening the lid.

Can I adjust cooking times and temperatures in a clip-on pressure cooker?

Yes, adjusting cooking times and temperatures is possible with a clip-on pressure cooker. Different recipes and ingredients may require variations in cooking parameters. Refer to your user manual for guidance on adjusting settings to achieve the desired results.

How do I clean and maintain my clip-on pressure cooker for longevity?

After each use, disassemble removable parts for cleaning, such as the inner pot, sealing ring, and pressure valve. Wipe down the exterior with a damp cloth. Regularly inspect seals and valves for wear. Avoid abrasive cleaners and follow the manufacturer’s maintenance recommendations.

Can I cook rice and grains in a clip-on pressure cooker?

Absolutely. Clip-on pressure cookers excel at cooking rice and grains quickly and evenly. Follow recommended water-to-grain ratios, set the appropriate cooking time, and enjoy perfectly cooked rice and grains with minimal effort.

Is it possible to cook frozen ingredients in a clip-on pressure cooker?

Yes, clip-on pressure cookers are suitable for cooking frozen ingredients. Adjust the cooking time accordingly, as frozen items may require a slightly longer duration to reach the desired level of tenderness.

Can I use the clip-on pressure cooker for canning?

Most clip-on pressure cookers are not recommended for canning due to specific requirements for safe canning processes. For canning, it’s advisable to use a pressure canner designed explicitly for this purpose.

What are some tips for achieving the best results with a clip-on pressure cooker?

Experiment with different recipes, layer ingredients strategically for even cooking, and take advantage of the sealed environment to intensify flavors. Follow recommended guidelines for assembly, safety, and maintenance to ensure optimal performance.

Key Points

  1. Effortless Assembly: The clip-on lid mechanism simplifies the assembly process, making it user-friendly and accessible for both seasoned chefs and kitchen novices.
  2. Versatility in Cooking: From hearty stews to quick one-pot meals, clip-on pressure cookers accommodate a diverse range of recipes, providing flexibility and convenience.
  3. Time and Energy Efficiency: The sealed environment of clip-on pressure cookers accelerates cooking times, conserves energy, and retains the vibrant colors and nutrients of ingredients.
  4. Safety First: Equipped with secure lid mechanisms, pressure indicators, and reliable pressure release valves, clip-on pressure cookers prioritize safety, ensuring a worry-free cooking experience.
  5. Precision in Cooking: Adjustable pressure settings allow for precise control over cooking conditions, enabling you to tailor the cooking environment to suit different recipes.
  6. Easy Maintenance: Simple disassembly and cleaning procedures, along with regular maintenance, contribute to the longevity and optimal performance of your clip-on pressure cooker.

Benefits

  1. Time-Saving Convenience: Clip-on pressure cookers transform time-consuming recipes into quick and efficient culinary delights.
  2. Flavorful Creations: The sealed environment intensifies flavors, turning ordinary meals into extraordinary culinary experiences.
  3. Adaptability to Various Recipes: From tender meats to perfectly cooked grains, the clip-on pressure cooker adapts to a myriad of ingredients, allowing for diverse and delicious creations.
  4. Effortless Cleanup: User-friendly design and easy disassembly make cleaning a breeze, promoting a hassle-free post-cooking routine.

Our Final Thoughts

A clip-on pressure cooker is not just a kitchen appliance; it’s a gateway to a world of culinary possibilities. Whether you’re a busy professional, a home chef with a passion for experimentation, or someone looking to simplify their cooking routine, the clip-on pressure cooker stands ready to elevate your culinary experience. Embrace the convenience, savor the flavors, and enjoy the journey of creating delightful meals with this innovative kitchen companion.

Categories
Blog

Understanding What is A Convection Oven and Its Benefits

To kick things off, have you ever wondered what is a convection oven? If you’re looking for a new oven or simply curious about modern kitchen appliances, this guide is for you. By the end, you’ll have a clear picture of what a convection oven is and why it’s creating a buzz among home chefs and professionals alike.

What is a Convection Oven

What Is A Convection Oven Exactly?

Firstly, let’s break it down. A convection oven operates similarly to a conventional oven, with one significant difference: it has a fan. This fan circulates hot air around the food, cooking even faster. Simple, right?

The Science Behind It

Now, don’t get intimidated by the term ‘science’. We’ll keep it simple: when you cook food, hot air rises, and cool air sinks. In a regular oven, this can create pockets of uneven temperature. However, the fan ensures that hot air moves continuously in a convection oven. Consequently, food cooks more evenly and often quicker, too.

Benefits Of Using A Convection Oven

There are numerous advantages to using this kind of oven. Let’s dive into a few of them:

Even Cooking

As mentioned, the circulating air means no more hot or cold spots. You’ll find that your dishes, from roasts to baked goods, come out ideally.

Faster Cooking Times

Because of the even heat distribution, food cooks up to 25% faster. So, you’ll save not only time but also energy.

Better Browning

Convection ovens are a dream come true for those who love a golden crust on their bread or a crispy skin on their roast chicken.

Energy Efficient

With faster cooking times, you can use your oven for shorter periods. This translates to less energy consumption and a reduced electricity bill.

When Should You Use A Convection Oven?

While convection ovens are superb, they aren’t always the best choice for all dishes. For instance, dishes that require slow cooking without a crust, like custards or flans, might not benefit from the circulating air. Yet, they’re ideal for many other recipes, especially where you want a friendly browning or crisping effect.

Some Handy Tips

If you’re transitioning to a convection oven, keep in mind a few things:

Temperature Adjustment

Since food cooks faster, you might need to reduce the temperature by about 25°F compared to traditional recipes.

Check Early

Due to quicker cooking, checking on your dish a bit earlier than the recipe states is a good idea.

Use the Right Cookware

To make the most of the circulating air, use shallow pans or those with low sides.

Is It Worth The Investment?

To decide, consider your cooking habits. If you bake or roast often, you might find a convection oven a game-changer. Moreover, the energy efficiency factor might even save you money in the long run.

Features Unique To Convection Ovens

Besides the fan and exhaust system that distinguishes a convection oven, several other features are noteworthy:

Turbo Mode

Some convection ovens come with a turbo mode, increasing the fan’s speed. This is perfect for dishes that need even quicker cooking.

Twin Fans

While most have a single fan, some advanced models boast twin fans for enhanced air circulation.

Cooling Feature

Interestingly, specific models offer a rapid cooling feature, quickly reducing the temperature inside. This is ideal for bakers transitioning between high and low-temperature baking.

Common Misconceptions About Convection Ovens

They’re Too Complicated: Most people find them just as easy to use as conventional ovens, with the bonus of faster and even cooking.

Only Suitable for Baking

While they do wonders for baked goods, they’re also excellent for roasting, broiling, and dehydrating in some models.

They Use More Electricity

Due to their faster cooking times, they often use less energy in the long run.

Tips For The New Convection Oven Owner

Embracing a new kitchen gadget can sometimes feel overwhelming, but with these tips, you’ll find it’s a breeze:

Rotate Pans

If you’re cooking with multiple pans, rotate them halfway through to ensure an even cook, even though the circulation is better than conventional ovens.

Avoid Overcrowding

To maximise the circulating air, ensure enough space between items.

Maintenance

Occasionally, clean the fan and exhaust areas to ensure they work effectively. Dust and grease can build up over time.

Why Chefs Love Them

Professional chefs around the world swear by convection ovens. The consistent results and reduced cooking times make it an indispensable tool in commercial kitchens. But, even home cooks who have experienced the benefits of a convection oven rarely return to conventional ones.

Our Final Thoughts

Its innovative circulating air feature ensures even cooking, rapid results, and low energy consumption. It may not be ideal for every recipe, but it has found a helpful position in many modern kitchens.

Categories
Blog

How to Clean Your Cast Iron Skillet Easily – A Simple Guide

Cast iron skillets are a great way to cook, but they can be difficult to clean if you don’t know how. Here are step-by-step instructions on how to clean a cast iron skillet:

  1. First, rinse the skillet under hot water to remove any loose debris.
  2. Then, add a small amount of dish soap to the skillet and scrub it with a soft sponge.
  3. Be careful not to use too much soap, as this can strip the seasoning from the skillet.
  4. Rinse the skillet thoroughly with hot water to remove all of the soap.
  5. Dry the skillet thoroughly with a towel.
  6. Wipe a thin layer of oil on the skillet to prevent it from rusting.

By following these steps, you can keep your cast iron skillet clean and seasoned for years to come.

What materials you need

To clean a cast iron skillet, you will need the following materials:

  • Cast iron skillet
  • Hot water
  • Dish soap
  • Sponge
  • Coarse salt
  • Olive oil

Step-by-step instructions

how to clean a cast iron skillet

To clean a cast iron skillet, you will need

  • A cast iron skillet
  • Warm water
  • A stiff brush
  • Salt
  • Oil

To clean your cast iron skillet, follow these steps

  1. Rinse the skillet under warm water.
  2. Add a few tablespoons of salt to the skillet.
  3. Use a stiff brush to scrub the skillet, working in a circular motion.
  4. Rinse the skillet again under warm water.
  5. Dry the skillet thoroughly with a towel.
  6. Apply a thin coat of oil to the skillet.

By following these steps, you can keep your cast iron skillet clean and seasoned for years to come.

Common mistakes to avoid

When cleaning your cast iron skillet, there are a few common mistakes to avoid.

  • Don’t use soap or detergent.
  • Don’t soak your skillet in water.
  • Don’t scrub your skillet with a harsh abrasive.
  • Don’t dry your skillet in the dishwasher.

By avoiding these mistakes, you can help keep your cast iron skillet in good condition and prevent it from rusting.

How to season a cast iron skillet

How to season a cast iron skillet

Seasoning a cast iron skillet is the process of creating a protective layer of oil on the surface of the pan. This layer helps to prevent rust and makes the pan more non-stick.

To season a cast iron skillet, you will need

  • A cast iron skillet
  • Vegetable oil
  • A paper towel

Step-by-step instructions

  1. Preheat the oven to 350 degrees Fahrenheit.
  2. Wipe the inside of the skillet with a paper towel to remove any dirt or grease.
  3. Pour a thin layer of vegetable oil into the skillet.
  4. Use the paper towel to spread the oil evenly over the surface of the pan.
  5. Place the skillet in the oven and bake for 1 hour.
  6. Let the skillet cool completely before using it.

Common mistakes to avoid

  • Don’t use too much oil. A thin layer is all you need.
  • Don’t overseas on the pan. One coat of oil is enough.
  • Don’t use soap to clean the pan. Soap can strip away the seasoning.

FAQs about cast-iron skillets

Here are some of the most frequently asked questions about cast iron skillets, along with answers

Can I put a cast iron skillet in the dishwasher?

No, you should never put a cast iron skillet in the dishwasher. The harsh chemicals and high heat can damage the seasoning on the skillet, making it more likely to rust.

Can I use soap to clean a cast iron skillet?

Yes, you can use soap to clean a cast iron skillet, but you should only use mild soap and be sure to rinse the skillet thoroughly afterwards. Harsh soaps can strip away the seasoning on the skillet, making it more likely to rust.

How do I prevent my cast iron skillet from rusting?

To prevent your cast iron skillet from rusting, you should:

  • Always dry your skillet thoroughly after washing it.
  • Oil the skillet lightly after washing it.
  • Store your skillet in a dry place.

What can I use to season a cast iron skillet?

You can use any oil to season a cast iron skillet, but some oils are better than others. The best oils for seasoning a cast iron skillet are:

  • Canola oil
  • Vegetable oil
  • Flaxseed oil

How often should I season my cast iron skillet?

You should season your cast iron skillet every time you clean it. This will help to keep the seasoning from wearing off and will help to prevent rust.

What is the best way to cook with a cast iron skillet?

The best way to cook with a cast iron skillet is over medium-high heat. This will allow the skillet to heat evenly and will help prevent food from sticking.

What are some of the benefits of using a cast iron skillet?

Cast iron skillets are a great choice for cooking because they:

  • Heat evenly
  • Hold heat well
  • Are durable
  • Are versatile

Where can I buy a cast iron skillet?

You can buy cast iron skillets at most kitchenware stores. You can also find them online at retailers like Amazon and eBay. Tips and tricks for using a cast iron skillet.

Tips and tricks for using a cast iron skillet

Here are some tips and tricks for using a cast iron skillet:

  • Always preheat your cast iron skillet before using it. This will help to prevent sticking.
  • Use a little oil or butter to grease the skillet before adding food. This will also help to prevent sticking.
  • Don’t use soap to clean your cast iron skillet. Soap can remove the seasoning from the skillet, which is what helps to make it non-stick.
  • If your cast iron skillet becomes rusty, you can clean it by scrubbing it with a paste made of equal parts salt and vinegar.
  • If your cast iron skillet is burned, you can clean it by filling it with water and baking soda, and then bringing it to a boil.
  • To season your cast iron skillet, rub it with a thin layer of oil and then bake it in the oven at 350 degrees Fahrenheit for 30 minutes.
  • To care for your cast iron skillet, store it in a dry place and avoid exposing it to moisture.

Benefits of using a cast iron skillet

Cast iron skillets are a versatile kitchen tool that can be used for a variety of cooking tasks. They are known for their ability to retain heat evenly, which makes them ideal for searing, frying, and baking. Cast iron skillets also develop a natural non-stick surface over time with use, which makes them easy to clean.

Here are some of the benefits of using a cast iron skillet

  • They are durable and can last for generations.
  • They heat evenly, making them ideal for searing, frying, and baking.
  • They develop a natural non-stick surface over time with use.
  • They can be used on all types of cooking surfaces, including gas, electric, and induction.
  • They are relatively inexpensive.

If you are looking for a versatile and durable kitchen tool, a cast iron skillet is a great option. They are easy to use and maintain, and they will provide you with years of delicious cooking.

Categories
Blog

How to Use a Tea Kettle (The Right Way)

Tea kettles are a convenient way to make hot tea. They can also be used to boil water for other purposes, such as cooking or making instant noodles.

How to Use a Kettle

how to use a kettle

To use a kettle, simply fill it with water, place it on the stove, and turn the heat on. Once the water comes to a boil, turn off the heat and carefully pour the boiling water into your cup.

Here are some tips for using a kettle:

  • Always use cold water in your kettle.
  • Never fill the kettle more than halfway full.
  • Never leave the kettle unattended while it is boiling.
  • Be careful when pouring boiling water from the kettle.

For more information on how to use a kettle, please consult the manufacturer’s instructions.

How to descale a kettle

Descaling a kettle is important to maintain its performance and extend its lifespan. Hard water can build up on the inside of a kettle, forming a layer of mineral deposits that can make it difficult to boil water and can also affect the taste of your tea.

To descale a kettle, you will need:

  • white vinegar
  • A clean cloth
  • A kettle

To descale your kettle, follow these steps:

  1. Fill the kettle with equal parts white vinegar and water.
  2. Bring the mixture to a boil.
  3. Turn off the heat and let the mixture sit in the kettle for 30 minutes.
  4. Use the clean cloth to wipe down the inside of the kettle.
  5. Rinse the kettle thoroughly with warm water.

You should descale your kettle every 3–6 months, depending on how hard your water is.

Safety tips for using a kettle

When using a kettle, it is important to follow these safety tips to avoid accidents:

  • Never fill the kettle above the maximum fill line.
  • Never leave the kettle unattended while it is boiling water.
  • Do not touch the kettle while it is hot.
  • Be careful not to spill boiling water when pouring it from the kettle.
  • Unplug the kettle when it is not in use.

Common problems with kettles

Here are some common problems with kettles and how to troubleshoot them:

  • The kettle won’t boil water.
  • The kettle is leaking.
  • The kettle is making a strange noise.
  • The kettle is not heating evenly.
  • The kettle is turning off by itself.

For each problem, there are a few possible causes and solutions. Here is a more detailed explanation of each problem and how to troubleshoot it:

The kettle won’t boil water

  • The kettle is not plugged in.
  • The power cord is damaged.
  • The thermostat is not working properly.
  • The heating element is damaged.

The kettle is leaking

  • The kettle is not properly assembled.
  • The seals are damaged.
  • The kettle is cracked.

The kettle is making a strange noise

  • The kettle is not properly assembled.
  • The heating element is loose.
  • The kettle is cracked.

The kettle is not heating evenly

  • The kettle is not properly assembled.
  • The heating element is damaged.
  • The kettle is cracked.

The kettle is turning off by itself

  • The thermostat is not working properly.
  • The heating element is damaged.
  • The kettle is cracked.

If you are unable to troubleshoot the problem yourself, you can contact the manufacturer of your kettle for assistance.

How to troubleshoot kettle problems

If you are having problems with your kettle, there are a few things you can check to try to troubleshoot the issue.

  • Make sure that the kettle is plugged in and turned on.
  • Check the water level in the kettle. The kettle should be filled with enough water to reach the fill line.
  • Check the heating element. If the heating element is damaged, it will not be able to heat the water properly.
  • Check the thermostat. If the thermostat is not working properly, it will not be able to regulate the temperature of the water.

If you have checked all of these things and the problem persists, you may need to have the kettle repaired or replaced.

FAQs about kettles

What is the best type of kettle to buy?

There are many different types of kettles on the market, each with its own advantages and disadvantages. The best type of kettle for you will depend on your individual needs and preferences. Some factors to consider when choosing a kettle include:

  • Your budget
  • The size of your kitchen
  • Your preferred heating method
  • Your desired features

How do I use a kettle?

To use a kettle, simply fill it with water up to the fill line, plug it in, and turn it on. Once the water has boiled, you can turn off the kettle and pour the hot water into your cup.

How do I clean a kettle?

To clean a kettle, you can either use a descaling solution or a vinegar and baking soda solution. To use a descaling solution, simply follow the instructions on the product label. To use a vinegar and baking soda solution, mix equal parts vinegar and baking soda in a bowl. Pour the solution into the kettle and let it sit for several hours. Then, rinse the kettle thoroughly with hot water.

How do I descale a kettle?

To descale a kettle, you can either use a descaling solution or a vinegar and baking soda solution. To use a descaling solution, simply follow the instructions on the product label. To use a vinegar and baking soda solution, mix equal parts vinegar and baking soda in a bowl. Pour the solution into the kettle and let it sit for several hours. Then, rinse the kettle thoroughly with hot water.

What are the safety risks of using a kettle?

There are a few safety risks associated with using a kettle, including:

  • Electric shock
  • Burns
  • Water leaks

To avoid these risks, it is important to follow the following safety tips:

  • Never immerse a kettle in water
  • Never touch the kettle while it is plugged in
  • Never fill the kettle above the fill line
  • Inspect the kettle regularly for cracks or damage

What are the most common problems with kettles?

The most common problems with kettles include:

  • The kettle won’t boil water
  • The kettle leaks water
  • The kettle makes a loud noise

To troubleshoot these problems, you can try the following:

  • Check the power cord to make sure it is plugged in properly
  • Check the water level to make sure it is above the fill line
  • Clean the kettle to remove any mineral deposits

If you are unable to troubleshoot the problem yourself, you may need to contact a qualified appliance repair technician.

Categories
Blog

How to Clean Your Rice Cooker Like a Pro – Expert Tips for Ultimate Hygiene

A rice cooker is a beloved kitchen appliance that simplifies the process of cooking fluffy, perfectly steamed rice. However, just like any other kitchen tool, it requires regular maintenance and cleaning to ensure its longevity and performance. Neglecting your rice cooker’s maintenance can lead to burnt rice, unpleasant odors, and even hygiene issues. In this comprehensive guide, we’ll explore how to clean a rice cooker and delve into various aspects of rice cooker maintenance, including cleaning tips, mold prevention, and safety precautions. So, let’s dive in and make sure your trusty rice cooker stays in pristine condition.

how to clean rice cooker

How to Clean a Rice Cooker

Cleaning your rice cooker is a fundamental aspect of its maintenance. Here’s a step-by-step guide on how to clean a rice cooker effectively.

Unplug the rice cooker and wait for it to cool down before cleaning.

Remove the inner pot and wash it with warm, soapy water. Use a soft sponge or cloth to avoid scratching the pot’s surface.

Be cautious not to submerge the entire rice cooker in water, as it can damage the electrical components. Instead, wipe the exterior with a damp cloth.

Pay special attention to the steam vent and the area around it. Use a small brush or a cotton swab to dislodge any food particles that may have accumulated.

For stubborn stains, a mixture of baking soda and water can be effective. Apply it to the stains, let it sit for a few minutes, and then scrub gently.

Wipe the heating plate with a damp cloth to remove any rice residue.

Finally, ensure all parts are thoroughly dry before reassembling your rice cooker.

Rice Cooker Maintenance

Rice cooker maintenance goes beyond just cleaning; it involves regular care and attention to detail. Here’s what you need to know.

Regularly check the power cord and plug for any signs of damage. If you notice any issues, replace them promptly to avoid electrical hazards.

Inspect the rubber gasket around the inner lid. If it’s damaged or worn, replace it to maintain the cooker’s seal, which is essential for proper cooking.

Clean the exterior of the rice cooker regularly to prevent dust and grime from accumulating. Use a mild cleaner or a mixture of vinegar and water for an eco-friendly option.

Now, let’s explore some essential rice cooker cleaning tips in detail.

Rice Cooker Cleaning Tips

Cleaning your rice cooker is not just about keeping it looking nice; it’s also about ensuring the appliance functions optimally. Here are some cleaning tips to keep in mind.

Regular Cleaning

Clean your rice cooker after each use. Leaving rice or food residue in the cooker can lead to burnt-on stains that are more challenging to remove.

Vinegar Cleaning

To remove mineral deposits and stubborn stains, mix a solution of equal parts water and vinegar. Use this solution to clean the inner pot and the heating plate.

Use Soft Materials

Avoid abrasive cleaning materials that can scratch the inner pot or the cooker’s surface. Opt for soft sponges or microfiber cloths.

How to Clean Rice Cooker with Vinegar

Cleaning your rice cooker with vinegar is an effective method to remove mineral deposits and stains.

Rice cookers are a convenient way to cook rice, but they can also become dirty over time. If you don’t clean your rice cooker regularly, it can start to smell and develop mold. Cleaning your rice cooker with vinegar is a quick and easy way to keep it clean and free of bacteria.

To clean your rice cooker with vinegar, you will need

  • 1 cup of white vinegar
  • 1 cup of water
  • A clean cloth or sponge

Instructions

  1. Pour the vinegar and water into the rice cooker.
  2. Turn on the rice cooker and set it to cook for 10 minutes.
  3. After 10 minutes, turn off the rice cooker and let it cool completely.
  4. Use the cloth or sponge to wipe down the inside of the rice cooker.
  5. Rinse the rice cooker with warm water.
  6. Dry the rice cooker with a towel.

By following these steps, you can easily clean your rice cooker and keep it free of bacteria.

Benefits of Cleaning Rice Cooker with Vinegar

There are many benefits to cleaning your rice cooker with vinegar, including:

  1. It can help to remove stubborn stains and odors.
  2. It can help to prevent the growth of bacteria.
  3. It can help to extend the lifespan of your rice cooker.

Overall, cleaning your rice cooker with vinegar is a simple and effective way to keep it clean and sanitary. It is a natural and inexpensive solution that can help to extend the lifespan of your rice cooker.

Tips for Cleaning Rice Cooker with Vinegar

Here are some tips for cleaning your rice cooker with vinegar:

  • Use white vinegar, not apple cider vinegar or other types of vinegar.
  • Fill the rice cooker with equal parts vinegar and water.
  • Turn on the rice cooker and let it cook for 10 minutes.
  • Turn off the rice cooker and let it cool completely.
  • Use a soft cloth or sponge to wipe down the inside of the rice cooker.
  • Rinse the rice cooker thoroughly with water.

By following these tips, you can clean your rice cooker with vinegar and keep it looking and smelling its best.

Common Mistakes to Avoid When Cleaning Rice Cooker with Vinegar

When cleaning your rice cooker with vinegar, there are a few common mistakes to avoid. These include:

  • Not using enough vinegar.
  • Using too much vinegar.
  • Not cleaning the rice cooker thoroughly.
  • Not rinsing the rice cooker thoroughly.

To avoid these mistakes, be sure to follow the instructions in the cleaning guide carefully. If you are unsure about how to clean your rice cooker, it is best to consult the manufacturer’s instructions.

Cleaning Rice Cooker After Use

Once you’ve enjoyed a delicious meal prepared in your rice cooker, it’s important to clean it thoroughly to maintain its hygiene and extend its lifespan. Here’s a more detailed look at post-cooking cleaning:

Prompt Action

After your rice has cooked, unplug the appliance and remove the inner pot. Leaving cooked rice inside for too long can make it stickier and harder to clean.

Food Residue Removal

Gently scrape off any stuck rice or food from the inner pot using a wooden or plastic utensil. Avoid metal utensils, as they can scratch the pot.

Soaking

If you’re dealing with stubborn residues, fill the pot with warm, soapy water and let it soak for a while. This will loosen any remaining food particles.

Rinse and Dry

Rinse the inner pot thoroughly, ensuring all soap residues are removed. Dry it completely before reinserting it into the rice cooker. Moisture left inside can lead to mold growth and affect the appliance’s performance.

Now, let’s delve into maintaining the overall hygiene of your rice cooker, a crucial aspect to ensure your meals are both tasty and safe to eat.

Rice Cooker Hygiene

Maintaining proper hygiene in your rice cooker is vital to avoid any contamination of your cooked rice and other foods. Here’s how to ensure your rice cooker remains a clean and safe kitchen appliance.

Regular Sanitization

Periodically, disinfect the inner pot and other parts of the rice cooker to eliminate any bacteria or germs. A mixture of water and a food-safe disinfectant can be used for this purpose.

Lid and Seals

Pay close attention to the lid and any seals or gaskets. These areas are prone to trapping moisture and food residues, which can lead to mold growth. Clean them thoroughly and allow them to dry completely.

Prevent Cross-Contamination

Avoid cooking other foods, like oatmeal or quinoa, directly in the rice cooker without cleaning it in between. Cross-contamination can occur, altering the taste and safety of your meals.

Removing Burnt Rice from Rice Cooker

Sometimes, despite your best efforts, rice can burn and stick to the bottom of the inner pot. Don’t worry; it’s a common issue. Here’s how to tackle burnt rice effectively.

Soak and Scrape

After unplugging and cooling down the rice cooker, fill the inner pot with warm, soapy water. Let it soak for a while to loosen the burnt rice. Then, use a non-abrasive sponge or plastic spatula to gently scrape off the burnt residues.

Baking Soda Solution

For stubborn burnt-on rice, create a paste using baking soda and water. Apply this paste to the affected area, let it sit for a few minutes, and then scrub gently. The baking soda’s abrasive properties help remove burnt rice without scratching the pot.

Rinse and Dry

Thoroughly rinse the inner pot, ensuring all cleaning agents are removed. Dry it completely to prevent any future burning issues.

Cleaning Rice Cooker Lid

The rice cooker lid is often overlooked when cleaning, but it's an essential part of ensuring your appliance remains in top condition.

The rice cooker lid is often overlooked when cleaning, but it’s an essential part of ensuring your appliance remains in top condition. Here’s how to clean it properly.

Unplug and Cool Down

As always, start by unplugging the rice cooker and allowing it to cool down.

Remove the Lid

Take off the lid from the rice cooker. Some lids can be disassembled for a more thorough cleaning; if yours can, do so.

Wash with Soapy Water

Wash the lid with warm, soapy water. Pay attention to any crevices or grooves where food particles or residue might accumulate.

Check the Seals

Inspect any rubber seals or gaskets on the lid. These should be cleaned and dried thoroughly to prevent mold or odors from developing.

Rinse and Dry

Rinse the lid and seals with clean water and ensure they are completely dry before reattaching the lid to the rice cooker.

Rice Cooker Mold Prevention

Preventing mold growth in your rice cooker is crucial for maintaining a healthy and safe kitchen environment. Let’s explore some tips to keep mold at bay.

Thorough Drying

After each use, make sure the inner pot, lid, and any seals are completely dry before reassembling the cooker. Moisture is a breeding ground for mold.

Regular Cleaning

Establish a routine for cleaning your rice cooker. This includes the inner pot, the lid, and any removable parts. Use a food-safe disinfectant periodically to prevent mold from taking hold.

Store Properly

When your rice cooker is not in use, leave the lid slightly ajar to allow for ventilation. This can help prevent moisture buildup inside the appliance.

Rice Cooker Cleaning Hacks

Cleaning your rice cooker doesn’t have to be a cumbersome chore. There are some clever cleaning hacks that can make the process more efficient and enjoyable.

Lemon Juice

To remove stubborn stains or odors, a mixture of lemon juice and water can work wonders. The natural acidity of lemon helps break down stains and leaves a fresh, clean scent.

Steam Cleaning

After cooking rice, pour some water into the empty pot, switch the cooker to “warm,” and let it steam. This can help loosen any stuck rice and make it easier to clean.

Cooking Spray

Before cooking, lightly spray the inner pot with cooking spray. This can help prevent rice from sticking to the bottom, making cleanup easier.

Lid Storage

Store the rice cooker lid upside down when not in use to allow better air circulation, reducing the chances of mold or unpleasant odors developing.

Rice Cooker Stain Removal

Stains on your rice cooker’s inner pot can be unsightly and sometimes affect the taste of your rice. Here’s how to effectively remove them.

Baking Soda Paste

Create a paste with baking soda and water, then apply it to the stained areas. Allow it to sit for a few minutes before gently scrubbing. The baking soda’s mild abrasiveness helps lift stains.

Vinegar Solution

If the stains are particularly stubborn, a mixture of white vinegar and water can be effective. Let it soak for a few hours before scrubbing and rinsing.

Non-Abrasive Scrubbers

Use non-abrasive scrubbers like nylon brushes or soft sponges to avoid scratching the pot.

Regular Cleaning

To prevent stubborn stains, clean your rice cooker promptly after each use. The quicker you address residues, the easier they are to remove.

Deep Cleaning Rice Cooker

Every once in a while, it’s a good idea to perform a deep cleaning of your rice cooker to ensure it’s in top shape. Here’s how you can achieve a thorough clean.

Disassembly

If your rice cooker allows, disassemble any removable parts such as the inner pot, steam tray, and lid. This will make it easier to clean every nook and cranny.

Soaking

Fill the sink or a basin with warm, soapy water and let the removable parts soak for a few hours. This will help to loosen any stubborn residues.

Scrubbing

Use a non-abrasive scrubber or brush to clean the inner pot, steam tray, and lid thoroughly. Pay special attention to any stains or stuck-on food.

Vinegar Cleaning

For mineral deposits on the heating plate or other areas, consider using a vinegar solution. As previously mentioned, mix equal parts of water and white vinegar, apply it to the affected areas, and scrub gently.

Drying

Ensure that all parts are completely dry before reassembling the rice cooker. This helps prevent mold growth and maintain the appliance’s performance.

Rice Cooker Cleaning Products

While many effective cleaning solutions can be made at home, there are also commercial rice cooker cleaning products available.

While many effective cleaning solutions can be made at home, there are also commercial rice cooker cleaning products available. Here’s how to use them effectively.

Read Instructions

Always follow the manufacturer’s instructions when using commercial cleaning products. Different products may have specific recommendations.

Safety Precautions

Some commercial cleaners can be abrasive or contain strong chemicals. Ensure you use them in a well-ventilated area, wear gloves, and keep them away from food.

Rinse Thoroughly

After using a commercial cleaner, be sure to rinse all parts of the rice cooker thoroughly to remove any residues of the product.

Rice Cooker Maintenance Routine

Maintaining a regular maintenance routine for your rice cooker is the key to keeping it in optimal condition. Here’s a guide to establish a maintenance schedule.

Daily Cleaning

After each use, clean the inner pot and wipe down the exterior of the rice cooker. This prevents food residues from hardening and makes deep cleaning easier.

Weekly Check

Once a week, inspect the power cord, plug, and rubber seals or gaskets for any signs of wear or damage. Promptly replace any damaged components.

Monthly Deep Clean

Set aside time each month for a deep cleaning session, which includes disassembling removable parts and giving the entire appliance a thorough cleaning.

Seasonal Checks

Depending on your usage, it’s a good idea to perform more detailed checks and cleaning at least a few times a year, especially in environments where mold growth is a concern.

Rice Cooker Maintenance Checklist

To help you keep track of your rice cooker’s maintenance, here’s a checklist you can use:

Daily

Clean the inner pot and wipe down the exterior.

Weekly

Inspect the power cord and plug for damage.

Check rubber seals or gaskets for wear and tear.

Monthly

Disassemble removable parts and perform a deep cleaning.

Seasonally

Pay special attention to areas prone to mold growth if you live in a humid environment.

Rice Cooker Disinfection

Disinfecting your rice cooker is vital to maintain food safety and hygiene. Here’s how you can do it.

Unplug and Disassemble

Always start by unplugging your rice cooker and disassembling removable parts like the inner pot and steam tray.

Disinfectant Solution

Create a disinfectant solution by mixing water with a food-safe disinfectant or a few drops of bleach. Ensure the solution is appropriate for kitchen appliances.

Soaking

Place the removable parts in the disinfectant solution and allow them to soak for at least 10-15 minutes. This helps eliminate bacteria and germs.

Scrub and Rinse

After soaking, scrub the parts gently using a soft sponge or brush. Pay special attention to seams and crevices where residue might hide. Rinse thoroughly with clean water.

Dry Completely

Allow all parts to air dry completely before reassembling your rice cooker.

Disinfecting your rice cooker is especially important if you’ve used it to cook various foods, as it ensures that your rice cooker is safe for preparing meals.

Eco-Friendly Rice Cooker Cleaning

If you prefer eco-friendly cleaning methods, there are natural solutions you can use to maintain your rice cooker.

Vinegar and Baking Soda

A mixture of white vinegar and baking soda can effectively remove stains and mineral deposits. Sprinkle baking soda, then spray vinegar and scrub gently.

Lemon Juice

Lemon juice not only removes stains but also leaves a fresh scent. Apply lemon juice to stains, let it sit for a few minutes, and then scrub.

Boiling Water

Periodically, boil a pot of water in your rice cooker without any rice or food. This helps remove any lingering odors and residues.

Cleaning Rice Cooker Gasket

The gasket, or rubber seal, is an essential component of your rice cooker, ensuring a tight seal for proper cooking. Here’s how to clean and maintain it.

Unplug and Disassemble

As always, begin by unplugging the rice cooker and disassembling any removable parts.

Gasket Removal

Carefully remove the gasket from the lid. If it’s difficult to remove, gently use a non-abrasive tool, like a plastic spoon, to lift it from its groove.

Wash and Rinse

Wash the gasket with warm, soapy water, being mindful of any food or debris trapped in its grooves. Rinse it thoroughly to ensure all soap residues are gone.

Check for Damage

Inspect the gasket for signs of wear, tears, or deformation. If you notice any issues, it’s a good idea to replace the gasket to maintain a proper seal.

Dry Completely

Allow the gasket to air dry completely before reattaching it to the lid.

Rice Cooker Cleaning Safety Tips

While maintaining your rice cooker is essential, it’s equally important to follow safety precautions. Here are some safety tips for cleaning your rice cooker.

Unplug and Cool Down

Always unplug the rice cooker and allow it to cool down before cleaning. This prevents electrical accidents and burns.

Use Safe Cleaning Products

If you use commercial cleaning products, ensure they are safe for kitchen appliances. Avoid harsh chemicals that can leave residues or fumes.

Ventilation

Maintain proper ventilation when using cleaning products. Open windows or use exhaust fans to prevent inhaling strong odors or fumes.

Wear Gloves

If you’re handling cleaning solutions or abrasive materials, wearing gloves can protect your skin.

Dry Thoroughly

Ensure all parts are completely dry before reassembling the rice cooker. Moisture can cause electrical issues and mold growth.

Rice Cooker Cleaning Conclusion and Recap

This comprehensive guide covers every aspect of maintaining and cleaning your rice cooker, ensuring it remains a trusty companion in your kitchen for years to come. Let’s recap some key takeaways.

Regular Cleaning

Clean your rice cooker promptly after each use. This simple habit prevents food residues from hardening, making deep cleaning more manageable.

Deep Cleaning

Periodically, take the time to perform a deep cleaning, which includes disassembling removable parts and thorough scrubbing.

Safety Precautions

Always prioritize safety. Unplug your rice cooker before cleaning, use safe cleaning products, and ensure proper ventilation.

Eco-Friendly Cleaning

Consider eco-friendly cleaning methods using natural ingredients like vinegar, baking soda, and lemon juice.

Gasket Maintenance

Don’t forget to clean and inspect the rubber gasket to maintain a proper seal for cooking.

Maintenance Routine

Establish a maintenance routine to ensure that you don’t overlook any essential tasks.

By following these guidelines and tips, you’ll not only keep your rice cooker in excellent condition but also guarantee that your meals are cooked safely and hygienically.

Whether you’re a seasoned chef or just getting started in the kitchen, taking good care of your rice cooker is a simple yet effective way to enhance your cooking experience and enjoy delicious, perfectly steamed rice every time.

Categories
Blog

How To Clean A Tea Kettle – Mastering the Art of Cleaning Your Tea Kettle

Making sure your tea kettle stays in good shape is important for making the best cup of tea. Over time, your kettle might get mineral deposits, stains, and leftover bits from use, but don’t worry—these things can actually make your tea taste better. In this blog, we’re happy to share a simple guide on how to clean your tea kettle step by step. This will help it stay in great condition so you can enjoy brewing delightful tea for many years.

Prepare Your Cleaning Essentials

Before you begin the cleaning process, make sure you have the following items at hand:Tea Kettle Cleaning Supplies

  • Distilled white vinegar
  • Baking soda
  • Water
  • Soft sponge or cloth
  • Mild dish soap
  • Lemon (optional for natural cleaning and deodorizing)

Cleaning The Exterior

Start by unplugging the tea kettle if it’s electric, or ensure it is cool to the touch if it’s a stovetop kettle. Wipe the exterior of the kettle with a damp cloth or sponge to remove any dust or dirt. Avoid using abrasive materials that could scratch the surface.

Cleaning The Interior

Vinegar and Water Method

  • Fill the kettle halfway with a 1:1 mixture of white vinegar and water.
  • Bring the solution to a boil. Once the water reaches a rolling boil, turn off the kettle and let the mixture sit inside for about 15-20 minutes. The acidic nature of vinegar will help dissolve mineral deposits and scale.
  • After soaking, pour out the vinegar solution and rinse the kettle thoroughly with water at least two to three times to remove any residual vinegar.

Baking Soda Method

  • Mix 2 tablespoons of baking soda with water to form a paste.
  • Apply the paste to the kettle’s interior, particularly to areas with stubborn stains or residue.
  • Allow the paste to sit for about 30 minutes.
  • Gently scrub the interior with a soft sponge to remove the deposits.
  • Rinse the kettle thoroughly with water to eliminate any leftover baking soda.

Natural Lemon Cleaning (Optional)

  • Cut a lemon into slices and place them in the kettle.
  • Fill the kettle with water and bring it to a boil.
  • Let it simmer for about 15 minutes before turning off the heat.
  • The citric acid in the lemon will help break down mineral deposits and leave a fresh scent.
  • Rinse the kettle with water to remove any lemon residue.

Dealing With Stubborn Stains

For stubborn stains that don’t respond to the above methods, try boiling a mixture of water and a few tablespoons of white vinegar or lemon juice. Allow it to sit in the kettle for an hour or so, then scrub and rinse.

Cleaning The Filter Or Spout (If Applicable)

If your tea kettle has a removable filter or spout, clean them separately with warm, soapy water. Rinse thoroughly before reattaching them to the kettle.

Regular Maintenance

To keep your tea kettle clean and in top-notch condition, consider the following maintenance tips:

  • Make it a habit to empty the kettle and rinse it with clean water after each use for optimal maintenance.
  • Describe your kettle every month or as needed, depending on the hardness of your water and frequency of use.
  • Opt for gentle cleaning solutions to avoid any potential harm to the kettle’s interior or any impact on the delightful taste of your tea.

Descaling With Commercial Cleaners (Optional)

If you prefer commercial descaling agents, ensure they are specifically designed to remove mineral deposits from tea kettles. Follow the product’s packaging instructions to ensure safe and effective use. Be sure to rinse the kettle thoroughly after descaling to eliminate any traces of the cleaner.

Cleaning The Lid And Handle

Don’t forget to clean the kettle’s lid and handle. These areas often accumulate dirt, grime, and fingerprints. Wipe them down with a soft cloth or sponge soaked in warm, soapy water. Pay attention to any nooks and crevices that may require extra care.

Cleaning The Base (For Electric Kettles)

If you own an electric kettle with a detachable base, it’s also essential to clean it regularly. Wipe the base with a damp cloth to remove dust and spills. Always remember to avoid immersing the electric base in water or any cleaning solution, as it contains essential electrical components.

Preventing Future Buildup

Consider using filtered or distilled water to reduce mineral deposits and limescale buildup when filling your kettle. This will minimize the amount of mineral content and extend the time between descaling sessions. Moreover, be sure to empty any remaining water from the kettle after each use to keep stagnant water from inviting impurities.

Addressing Lingering Odors

If your tea kettle has a lingering odor from previous boils, you can eliminate it with a simple solution. Fill the kettle with water and add a few drops of vanilla extract or a teaspoon of baking soda. Bring the mixture to a boil, then let it cool before rinsing. This will help neutralize any unpleasant smells.

Cleaning The Exterior (For Electric Kettles)

For electric kettles with stainless steel or plastic exteriors, it’s advisable to refrain from using abrasive sponges or harsh chemicals during the cleaning process. Instead, use a soft cloth, sponge, and mild dish soap to clean the exterior. Make sure to dry it thoroughly to prevent water spots or streaks.

Regular Inspection

Regularly inspect your tea kettle for signs of wear and tear. Check for any cracks, rust, or other damage that may compromise its safety or performance. If you observe any concerns, it might be a suitable moment to consider replacing the kettle.

Top 5 Best Pots for Boiling Water

How do you clean the inside of a stainless steel kettle?

How do you clean the inside of a stainless steel kettleCleaning the inside of a stainless steel kettle is a straightforward process. Here’s a step-by-step guide to help you

Materials you will need:

  • Water
  • White vinegar or lemon juice
  • Baking soda (optional)
  • Soft brush or sponge
  • Soft cloth or towel

Step 1: Empty the kettle

Make sure the kettle is empty and unplugged from the power source. Allow it to cool down if it was recently used.

Step 2: Prepare the cleaning solution

Mix equal parts of water and white vinegar or lemon juice. You can use only water and add a tablespoon of baking soda for cleaning power. The acidity of vinegar or lemon juice helps remove limescale and mineral deposits.

Step 3: Fill the kettle

Pour the cleaning solution into the kettle until it’s about half full. If you’re using baking soda, you can add it directly to the kettle.

Step 4: Boil the solution

Place the kettle on the stove and bring the solution to a boil. Let it simmer for 10-15 minutes, but do not let it boil dry.

Step 5: Let the solution sit

After boiling, turn off the heat and let the solution sit in the kettle for at least 30 minutes. This allows the acid to break down the deposits on the interior.

Step 6: Scrub the interior

Use a soft brush or sponge to scrub the inside of the kettle gently. Pay special attention to areas with stubborn deposits. Avoid harsh abrasives or steel wool as they may scratch the stainless steel surface.

Step 7: Rinse thoroughly

Pour out the cleaning solution from the kettle and thoroughly rinse it with clean water multiple times to remove all traces of vinegar or lemon juice.

Step 8: Wipe the exterior

While cleaning the kettle, don’t forget to wipe down the exterior with a damp cloth to remove any dirt or stains.

Step 9: Dry the kettle

Finally, use a soft cloth or towel to dry the inside and outside of the kettle completely.

Your stainless steel kettle should now be clean and free from limescale and mineral deposits. Remember to perform this cleaning routine regularly to keep your kettle in top condition and ensure the best-tasting beverages.

How to clean kettle with vinegar

how to clean kettle with vinegar

To maintain the efficiency of your kettle and ensure it produces the best-tasting beverages, consider using vinegar for cleaning with the following steps.

Gather Your Supplies

  1. White vinegar
  2. Water
  3. A soft cloth or sponge
  4. A brush or an old toothbrush

Prepare the Cleaning Solution

Combine equal parts of water and white vinegar. Typically, 1-2 cups of each should suffice for a standard-sized kettle.

Energize the Solution

Place your kettle on the stove or plug it in, and let the water and vinegar mixture come to a lively boil. Allow it to boil for a few minutes.

Let the Magic Happen

Turn off the heat and unplug the kettle. Give the solution some time, about 15-20 minutes, to work its magic on mineral deposits and limescale.

Embrace the Cleanup

Use a soft cloth or sponge to lovingly clean the kettle’s interior. For any persistent build-up, employ a brush or even an old toothbrush to reach every nook and cranny.

A Refreshing Rinse

Empty the kettle and shower it with a thorough rinse using fresh, clean water. Ensure you rinse it multiple times to eliminate any remaining traces of vinegar.

Revitalize with Boiling Water

Fill the kettle with clean water and bring it to a revitalizing boil. This step will eradicate any lingering vinegar residues.

Repeat for Perfection

Empty the kettle once more and repeat the boiling process one or two more times, leaving your kettle immaculately free of any vinegar traces.

Polish the Exterior

Don’t overlook the outside of your kettle; give it some attention by wiping it down with a damp cloth or sponge to get rid of any vinegar splashes or blemishes.

Final Celebration

Fill your kettle with clean, clear water, bring it to a celebratory boil, and then joyfully discard the water. Your kettle is now ready to make your favorite beverages, imparting no vinegar or scale aftertaste.

Our Final Thoughts

A clean tea kettle not only ensures the best-tasting tea but also prolongs the lifespan of your appliance. Following the steps and tips outlined in this guide, you can keep your tea kettle pristine and performing at its best. Regular maintenance and cleaning will not only save you time in the long run. Still, they will also enhance your tea-drinking experience, allowing you to savour the soothing taste of tea, free from any unwanted residue or mineral buildup. Cheers to delightful cups of tea, made possible by a sparkling clean tea kettle!

Categories
Blog

How to Protect Glass Top Stove from Cast Iron – Tips and Tricks

People enjoy glass top stoves for their sleek and modern appearance, yet they require extra care compared to traditional stoves. Protecting them from scratches, stains, and other damage is crucial. Glass-top stoves can be sensitive, and materials like cast iron, with its weight, rough bottom, and heat retention, pose a risk of breaking them.

Fear not! With proper tools and techniques, you can safely use cast iron on your glass-top stove without the worry of damage. Let’s explore how to protect your glass-top stove while enjoying the benefits of cooking with cast iron.

How To Protect Glass Top Stove From Cast Iron

How To Protect Glass Top Stove From Cast Iron

To keep your stove’s glass top safe when using cast iron, follow these simple steps. First, make sure to clean your stove thoroughly before cooking. This prevents dirt or dust from scratching the glass surface. You can also use a silicone mat or a similar item to create a protective barrier between the cast iron and the stovetop.

Remember, always lift your cast iron pots and pans instead of dragging them across the stovetop. This not only protects the glass but also prevents cuts and scratches. Taking these precautions ensures a cleaner and safer cooking experience.

How to Pick the Right Cast Iron Cookware for a Glass Top Stove

To safeguard your glass-top stove and ensure optimal performance, it’s crucial to select suitable cast-iron cookware. Follow these guidelines:

Examine the Cookware’s Bottom

Ensure the cast iron cookware has a smooth, flat bottom with rounded corners. Avoid using pots and pans with rough or uneven bottoms, as they may scratch the stovetop.

Choose Appropriate Size and Weight

Opt for cookware that is not excessively heavy or large for your stove. Heavy pots and pans can create pressure points on the stovetop, while oversized ones may extend beyond the heating elements, leading to uneven cooking.

Prioritize Smooth and Rounded Edges

Select cookware with smooth and rounded edges to prevent any scratches on the stovetop. Sharp or rough edges can potentially damage the glass surface.

Consider Enamel-Coated Cast Iron

For glass top stoves, consider cast iron cookware with an enamel coating. This type of cookware features a smooth, nonreactive surface that won’t scratch or stain the stove. Keep in mind that enamel-coated options may be pricier compared to traditional cast iron cookware.

Remember these tips to not only protect your glass top stove but also to enhance the longevity of your cookware.

How to Stop Pans from Sliding on Glass Top Stoves

Glass top stoves are a popular choice for many kitchens, but they can also be a challenge to use. One of the biggest problems with glass top stoves is that pans can easily slide around, which can be dangerous and frustrating. There are a few things you can do to prevent pans from sliding on a glass top stove, however.

Causes of pans sliding on glass top stoves

There are a few reasons why pans might slide on a glass top stove.

  • The pans are too large for the stovetop.
  • The stovetop is too hot.
  • The pans are made of a slippery material.

How to prevent pans from sliding

a non-slip mat on a glass top stove

There are a few things you can do to prevent pans from sliding on a glass top stove.

  • Use a non-slip mat.
  • Place a trivet under the pans.
  • Use a potholder to grip the pans.

Materials needed

  • Non-slip mat
  • Trivet
  • Potholder

Steps

  1. Place a non-slip mat on the stovetop.
  2. Place a trivet under the pans.
  3. Use a potholder to grip the pans when you are moving them.

Tips

  • Make sure the non-slip mat is large enough to cover the entire stovetop.
  • Place the trivet in the center of the pan.
  • Use a potholder that is large enough to cover the entire pan.

How to Get Your Glass Top Stove Ready for Cast Iron Cookware

Getting your glass-top stove ready for cast-iron cookware is crucial to prevent any damage. Follow these steps with simplicity in mind:

Clean the Stove Surface

Wipe down the stove surface using a gentle cloth

Wipe down the stove surface using a gentle cloth and a cleaner that won’t harm the glass. This helps remove any dirt or dust.

Use a Heat Diffuser

Employ a heat diffuser – a metal plate placed between your pot or pan and the stovetop. This handy tool ensures even heat distribution, preventing hot spots. Additionally, it acts as a barrier to keep your cookware from directly touching the stove.

Place a Protective Layer between the Cookware and Stove

Place a Protective Layer between the Cookware and Stove

You can prevent scratches and stains by placing a silicone mat, a towel, or a layer of aluminum foil between your cooking utensils and the stove surface. This simple step will help keep your stove looking clean and in good condition.

Prevent Scratching or Harming Your Stove Surface

Raise your pots and pans instead of sliding them to maintain the stove surface in good condition and prevent any scratches or damage.

How To Use Cast Iron Cookware Safely on a Glass Top Stove

Cooking with cast iron on a glass-top stove requires a few adjustments in heat management and cooking methods. Here’s a simple guide to help you:

Gentle Preheating

Prior to cranking up the heat, slowly warm your cast iron pots and pans on low to medium settings for a few minutes. This gradual approach prevents rapid temperature changes that could harm the stove’s surface.

Optimal Heat Settings

Cast iron excels at retaining heat, so there’s no need for high-temperature settings on a glass-top stove. Stick to low to medium heat levels to avoid excessive heat that could potentially damage the stove or cookware.

Avoid Rapid Temperature Shifts

Steer clear of placing cold cast iron cookware onto a hot stove surface or pouring chilly liquids into hot cookware. Such sudden changes can lead to thermal shock, potentially causing damage to the stove.

Lid for Heat Retention

Enhance heat retention and moisture preservation by covering your pot or pan with a lid. This allows you to maintain a consistent temperature without the need to increase the heat setting.

How to Keep Your Glass Top Stove Spotless After Cooking with Cast Iron

Maintaining the cleanliness and longevity of your glass top stove is crucial, especially after using cast iron cookware. Follow these simple steps for effective cleaning and care:

Swiftly Tackle Residue or Stains

Act promptly by using a non-abrasive cleaner and a soft cloth to eliminate any residue or stains on the stove. Swift action prevents them from becoming permanent marks.

Opt for Gentle Cleaners and Tools

Choose non-abrasive cleaners and tools to clean the stove’s surface. Avoid scrubbers or abrasive materials, as they can potentially scratch and damage the glass.

Steer Clear of Harsh Chemicals or Abrasives

Refrain from using harsh chemicals, baking soda, or vinegar on the stove surface. These materials may lead to damage and discoloration over time.

Tackle Tough Stains with Glass Cooktop Cleaner

For stubborn stains, rely on a glass cooktop cleaner designed specifically for glass stoves. Follow the manufacturer’s instructions closely, using a soft cloth or sponge for application.

By adhering to these guidelines, you’ll not only maintain the pristine appearance of your glass top stove but also ensure its durability for years to come.

Will A Cast Iron Skillet Damage A Glass-Top Stove?

If you’re not cautious, using a cast-iron skillet on a glass-top stove might scratch or break the stove’s surface. When placing the cast iron pan on the burner, be sure not to let it slide, as this may result in scratches or even break the glass surface. However, it is feasible to use a cast-iron skillet on a glass-top stove without damaging the skillet surface if handled with care and a silicone mat is employed to safeguard the surface.

What Can You Put On A Glass-Top Stove To Protect It?

Maintaining the sleek appearance of a glass-top stove involves simple yet effective strategies. Use a silicone mat or trivet as a shield between the stove surface and your cooking utensils, providing a protective barrier. Additionally, placing a tempered glass cover over the stove offers protection against scratches and spills. Regularly cleaning the stove with gentle cleaning products prevents surface damage. Finally, when handling pots and pans, lift them off the stove rather than sliding them, as this further safeguards the surface from potential scratches. Following these practices ensures the longevity and cleanliness of your glass-top stove.

What Pans Should Not Be Used On A Glass-Top Stove?

Using a glass-top stove is convenient, but it’s crucial to choose the right pans to protect its surface and ensure good performance. Some pans, like cast iron or stoneware, can potentially scratch or break the glass if not handled carefully. It’s best to be cautious when using these materials. Additionally, pans with warped or uneven bottoms may harm the stove’s surface, so it’s important to opt for those with flat bottoms that sit evenly.

To prevent scratches or cracks, it’s advisable to avoid using pots or pans with rough or textured bottoms. Choosing cookware thoughtfully ensures a smooth cooking experience while keeping your glass-top stove in top condition.

Our Final Thoughts

Using cast iron cookware for cooking has its advantages as it evenly distributes heat and has a long lifespan. However, when using it on a glass-top stove, precautions are necessary to prevent damage. Employ a heat diffuser, gradually heat the pots and pans, and steer clear of abrupt temperature changes to avoid hot spots and scratches on the stove’s surface. To ensure the longevity of a glass-top stove, choose a cleaner that is gentle and won’t scratch the surface. Avoid harsh chemicals and rough materials during cleaning and maintenance. By following these steps, you can safely utilize cast-iron cookware on a glass-top stove without causing any harm or scratches.

FAQs

Can I Use Cast Iron Cookware on a Glass Top Stove?

Yes, you can use cast iron pots and pans on a glass-top stove, but it's important to be cautious to prevent any damage to the glass surface.

Why is Cast Iron Bad for Glass Top Stoves?

Using cast iron cookware on glass-top stoves may cause scratches and stains. This happens because the surfaces of these pots and pans are bumpy and not smooth. Moreover, they hold onto heat for a long time, creating hot spots that can harm the stove. To keep your glass stovetop safe, it's best to avoid using cast iron pots and pans.

Can I Use Enamel-Coated Cast Iron Cookware on a Glass Top Stove?

Absolutely! You can use enamel-coated cast iron cookware on a glass-top stove. The smooth and nonreactive surface of the enamel won't scratch or stain the stove. It's a safe and practical choice for cooking on your glass-top stove.

Can I Use a Cast Iron Griddle on a Glass Top Stove?

Yes, You can use a cast iron griddle on a glass top stove, but it's essential to take precautions to avoid damaging the glass. To ensure safety and prevent any potential breakage, employ a heat diffuser and refrain from moving the griddle around on the stovetop. This will help you enjoy the benefits of using a cast iron griddle without risking harm to your glass surface.