How To Clean A Tea Kettle | Mastering the Art of Cleaning Your Tea Kettle
Making sure your tea kettle stays in good shape is important for making the best cup of tea. Over time, your kettle might get mineral deposits, stains, and leftover bits from use, but don’t worry—these things can actually make your tea taste better. In this blog, we’re happy to share a simple guide on how to clean your tea kettle step by step. This will help it stay in great condition so you can enjoy brewing delightful tea for many years.
Prepare Your Cleaning Essentials To Clean A Tea Kettle
Before you begin the cleaning process, make sure you have the following items at hand:
- Distilled white vinegar
- Baking soda
- Water
- Soft sponge or cloth
- Mild dish soap
- Lemon (optional for natural cleaning and deodorizing)
Cleaning The Exterior
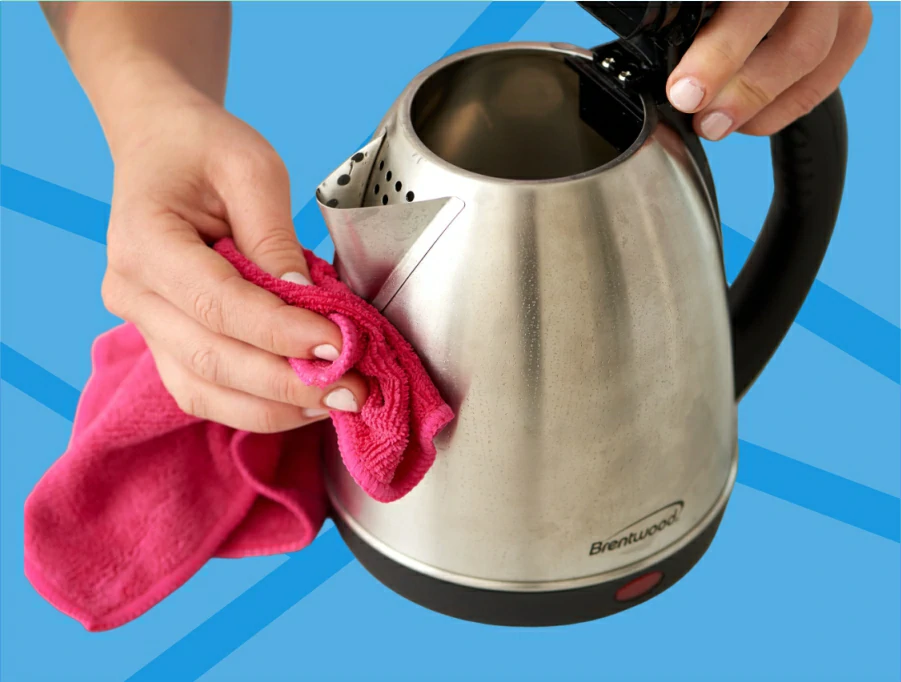
Start by unplugging the tea kettle if it’s electric, or ensure it is cool to the touch if it’s a stovetop kettle. Wipe the exterior of the kettle with a damp cloth or sponge to remove any dust or dirt. Avoid using abrasive materials that could scratch the surface.
Vinegar and Water Method
- Fill the kettle halfway with a 1:1 mixture of white vinegar and water.
- Bring the solution to a boil. Once the water reaches a rolling boil, turn off the kettle and let the mixture sit inside for about 15-20 minutes. The acidic nature of vinegar will help dissolve mineral deposits and scale.
- After soaking, pour out the vinegar solution and rinse the kettle thoroughly with water at least two to three times to remove any residual vinegar.
Baking Soda Method
- Mix 2 tablespoons of baking soda with water to form a paste.
- Apply the paste to the kettle’s interior, particularly to areas with stubborn stains or residue.
- Allow the paste to sit for about 30 minutes.
- Gently scrub the interior with a soft sponge to remove the deposits.
- Rinse the kettle thoroughly with water to eliminate any leftover baking soda.
Natural Lemon Cleaning (Optional)
- Cut a lemon into slices and place them in the kettle.
- Fill the kettle with water and bring it to a boil.
- Let it simmer for about 15 minutes before turning off the heat.
- The citric acid in the lemon will help break down mineral deposits and leave a fresh scent.
- Rinse the kettle with water to remove any lemon residue.
Dealing With Stubborn Stains
For stubborn stains that don’t respond to the above methods, try boiling a mixture of water and a few tablespoons of white vinegar or lemon juice. Allow it to sit in the kettle for an hour or so, then scrub and rinse.
Cleaning The Filter Or Spout (If Applicable)
If your tea kettle has a removable filter or spout, clean them separately with warm, soapy water. Rinse thoroughly before reattaching them to the kettle.
Regular Maintenance
To keep your tea kettle clean and in top-notch condition, consider the following maintenance tips:
- Make it a habit to empty the kettle and rinse it with clean water after each use for optimal maintenance.
- Describe your kettle every month or as needed, depending on the hardness of your water and frequency of use.
- Opt for gentle cleaning solutions to avoid any potential harm to the kettle’s interior or any impact on the delightful taste of your tea.
Descaling With Commercial Cleaners (Optional)
If you prefer commercial descaling agents, ensure they are specifically designed to remove mineral deposits from tea kettles. Follow the product’s packaging instructions to ensure safe and effective use. Be sure to rinse the kettle thoroughly after descaling to eliminate any traces of the cleaner.
Cleaning The Lid And Handle
Don’t forget to clean the kettle’s lid and handle. These areas often accumulate dirt, grime, and fingerprints. Wipe them down with a soft cloth or sponge soaked in warm, soapy water. Pay attention to any nooks and crevices that may require extra care.
Cleaning The Base (For Electric Kettles)
If you own an electric kettle with a detachable base, it’s also essential to clean it regularly. Wipe the base with a damp cloth to remove dust and spills. Always remember to avoid immersing the electric base in water or any cleaning solution, as it contains essential electrical components.
Preventing Future Buildup
Consider using filtered or distilled water to reduce mineral deposits and limescale buildup when filling your kettle. This will minimize the amount of mineral content and extend the time between descaling sessions. Moreover, be sure to empty any remaining water from the kettle after each use to keep stagnant water from inviting impurities.
Addressing Lingering Odors
If your tea kettle has a lingering odor from previous boils, you can eliminate it with a simple solution. Fill the kettle with water and add a few drops of vanilla extract or a teaspoon of baking soda. Bring the mixture to a boil, then let it cool before rinsing. This will help neutralize any unpleasant smells.
Cleaning The Exterior (For Electric Kettles)
For electric kettles with stainless steel or plastic exteriors, it’s advisable to refrain from using abrasive sponges or harsh chemicals during the cleaning process. Instead, use a soft cloth, sponge, and mild dish soap to clean the exterior. Make sure to dry it thoroughly to prevent water spots or streaks.
Regular Inspection
Regularly inspect your tea kettle for signs of wear and tear. Check for any cracks, rust, or other damage that may compromise its safety or performance. If you observe any concerns, it might be a suitable moment to consider replacing the kettle.
| Top 5 Best Pots for Boiling Water |
How do you clean the inside of a stainless steel kettle?
 Cleaning the inside of a stainless steel kettle is a straightforward process. Here’s a step-by-step guide to help you
Materials you will need:
- Water
- White vinegar or lemon juice
- Baking soda (optional)
- Soft brush or sponge
- Soft cloth or towel
Step 1: Empty the kettle
Make sure the kettle is empty and unplugged from the power source. Allow it to cool down if it was recently used.
Step 2: Prepare the cleaning solution
Mix equal parts of water and white vinegar or lemon juice. You can use only water and add a tablespoon of baking soda for cleaning power. The acidity of vinegar or lemon juice helps remove limescale and mineral deposits.
Step 3: Fill the kettle
Pour the cleaning solution into the kettle until it’s about half full. If you’re using baking soda, you can add it directly to the kettle.
Step 4: Boil the solution
Place the kettle on the stove and bring the solution to a boil. Let it simmer for 10-15 minutes, but do not let it boil dry.
Step 5: Let the solution sit
After boiling, turn off the heat and let the solution sit in the kettle for at least 30 minutes. This allows the acid to break down the deposits on the interior.
Step 6: Scrub the interior
Use a soft brush or sponge to scrub the inside of the kettle gently. Pay special attention to areas with stubborn deposits. Avoid harsh abrasives or steel wool as they may scratch the stainless steel surface.
Step 7: Rinse thoroughly
Pour out the cleaning solution from the kettle and thoroughly rinse it with clean water multiple times to remove all traces of vinegar or lemon juice.
Step 8: Wipe the exterior
While cleaning the kettle, don’t forget to wipe down the exterior with a damp cloth to remove any dirt or stains.
Step 9: Dry the kettle
Finally, use a soft cloth or towel to dry the inside and outside of the kettle completely.
Your stainless steel kettle should now be clean and free from limescale and mineral deposits. Remember to perform this cleaning routine regularly to keep your kettle in top condition and ensure the best-tasting beverages.
How to clean kettle with vinegar

To maintain the efficiency of your kettle and ensure it produces the best-tasting beverages, consider using vinegar for cleaning with the following steps.
Gather Your Supplies
- White vinegar
- Water
- A soft cloth or sponge
- A brush or an old toothbrush
Prepare the Cleaning Solution
Combine equal parts of water and white vinegar. Typically, 1-2 cups of each should suffice for a standard-sized kettle.
Energize the Solution
Place your kettle on the stove or plug it in, and let the water and vinegar mixture come to a lively boil. Allow it to boil for a few minutes.
Let the Magic Happen
Turn off the heat and unplug the kettle. Give the solution some time, about 15-20 minutes, to work its magic on mineral deposits and limescale.
Embrace the Cleanup
Use a soft cloth or sponge to lovingly clean the kettle’s interior. For any persistent build-up, employ a brush or even an old toothbrush to reach every nook and cranny.
A Refreshing Rinse
Empty the kettle and shower it with a thorough rinse using fresh, clean water. Ensure you rinse it multiple times to eliminate any remaining traces of vinegar.
Revitalize with Boiling Water
Fill the kettle with clean water and bring it to a revitalizing boil. This step will eradicate any lingering vinegar residues.
Repeat for Perfection
Empty the kettle once more and repeat the boiling process one or two more times, leaving your kettle immaculately free of any vinegar traces.
Polish the Exterior
Don’t overlook the outside of your kettle; give it some attention by wiping it down with a damp cloth or sponge to get rid of any vinegar splashes or blemishes.
Final Celebration
Fill your kettle with clean, clear water, bring it to a celebratory boil, and then joyfully discard the water. Your kettle is now ready to make your favorite beverages, imparting no vinegar or scale aftertaste.
Our Final Thoughts
A clean tea kettle not only ensures the best-tasting tea but also prolongs the lifespan of your appliance. Following the steps and tips outlined in this guide, you can keep your tea kettle pristine and performing at its best. Regular maintenance and cleaning will not only save you time in the long run. Still, they will also enhance your tea-drinking experience, allowing you to savour the soothing taste of tea, free from any unwanted residue or mineral buildup. Cheers to delightful cups of tea, made possible by a sparkling clean tea kettle!

